Colour and Pattern - The Rainbow Fish
We started off our Colour and Pattern topic with a book by Marcus Pfister - 'The Rainbow Fish', which has beautiful illustrations of scenes under the sea. This inspired us to create some underwater art of our own including this beautiful display we made as a class. Everyone made a shimmering scale from pieces of shiny silver paper, and another one using shades of either blue, green, pink or purple tissue paper, just like the illustrations in the book.
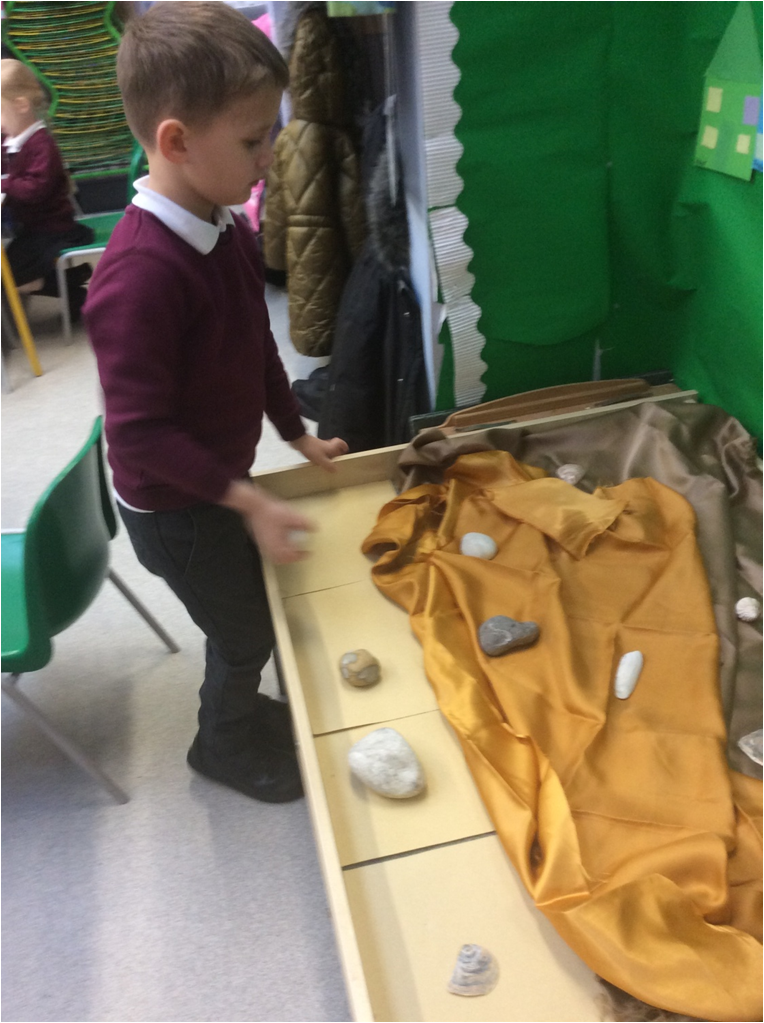
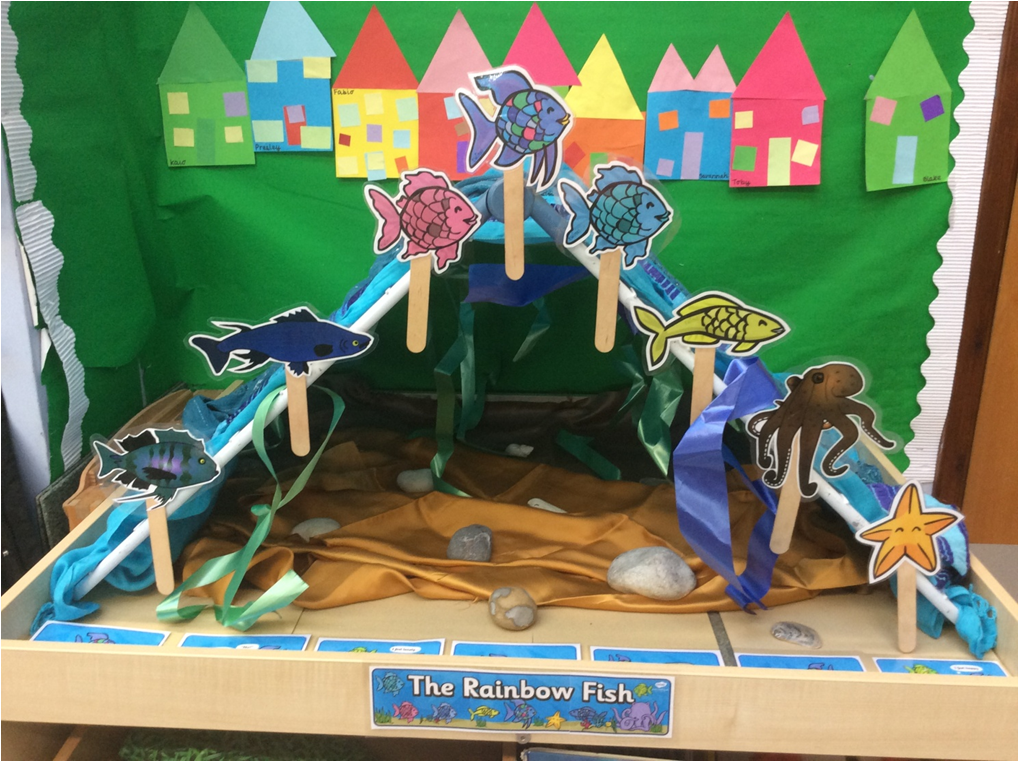
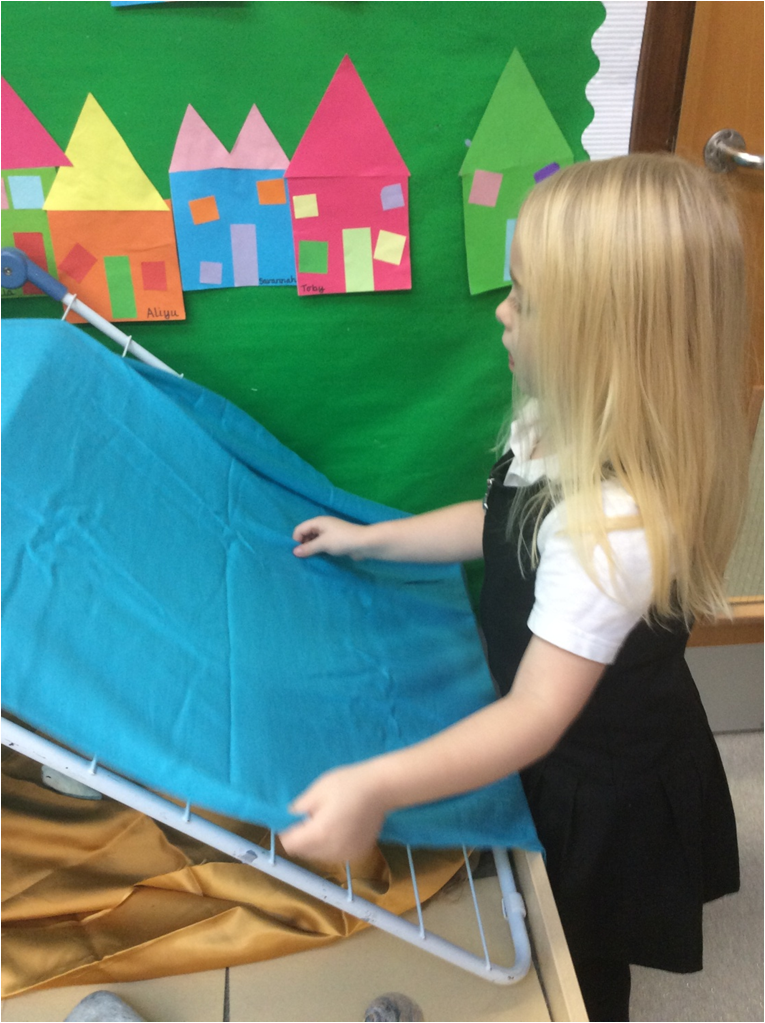
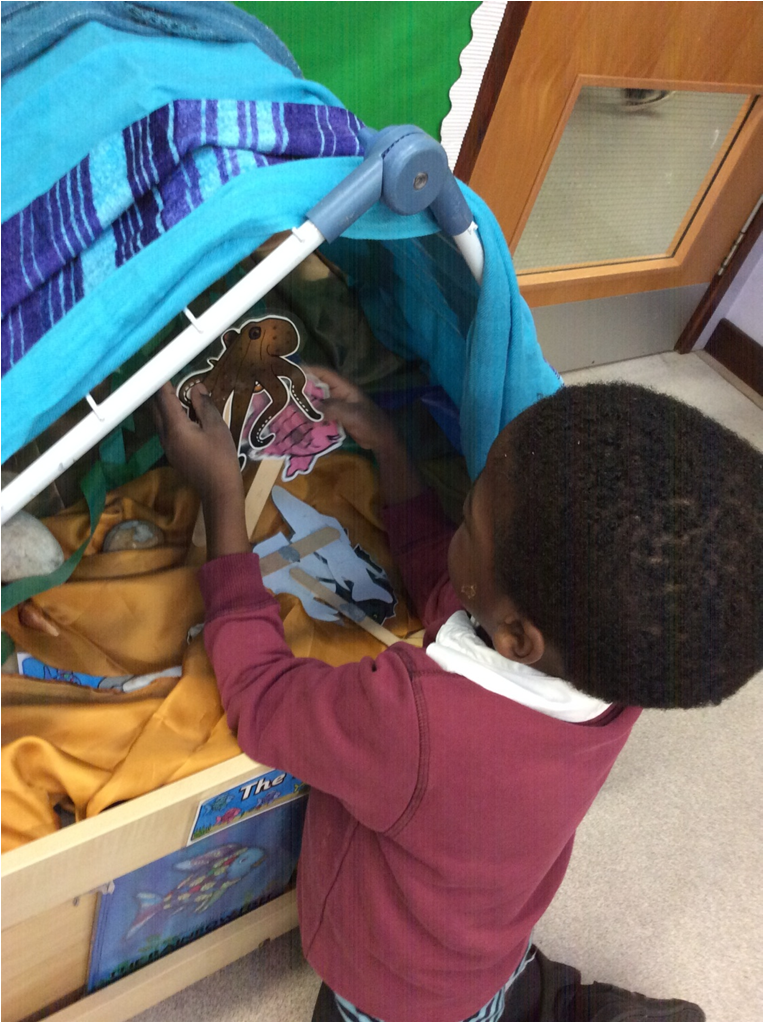
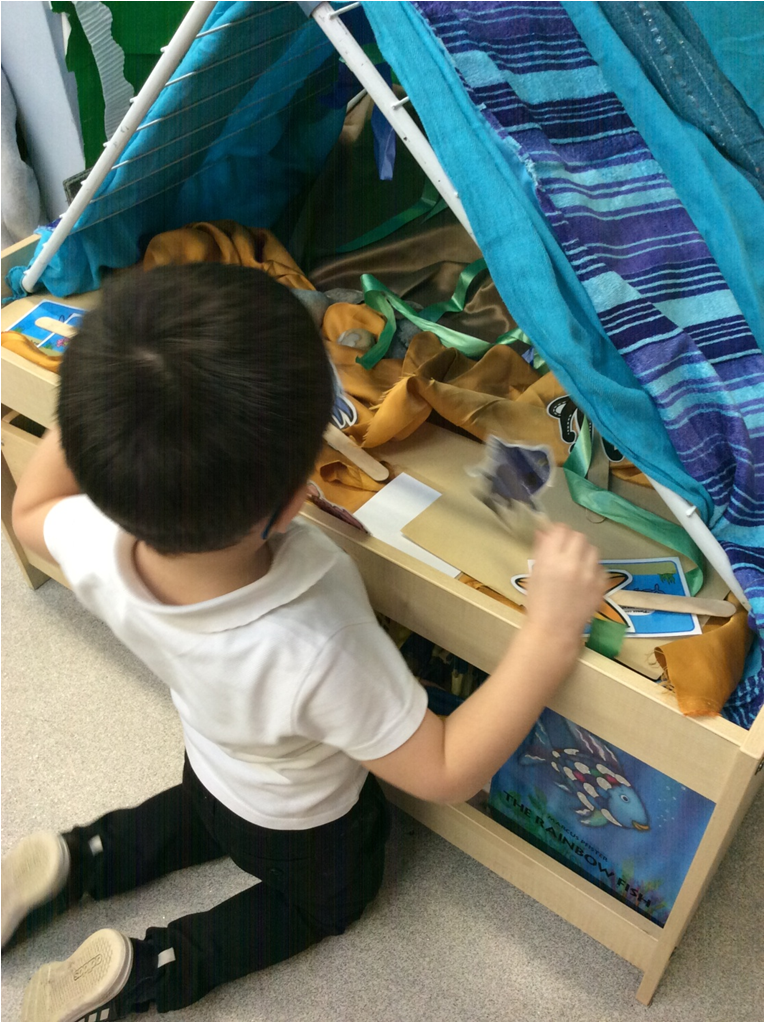
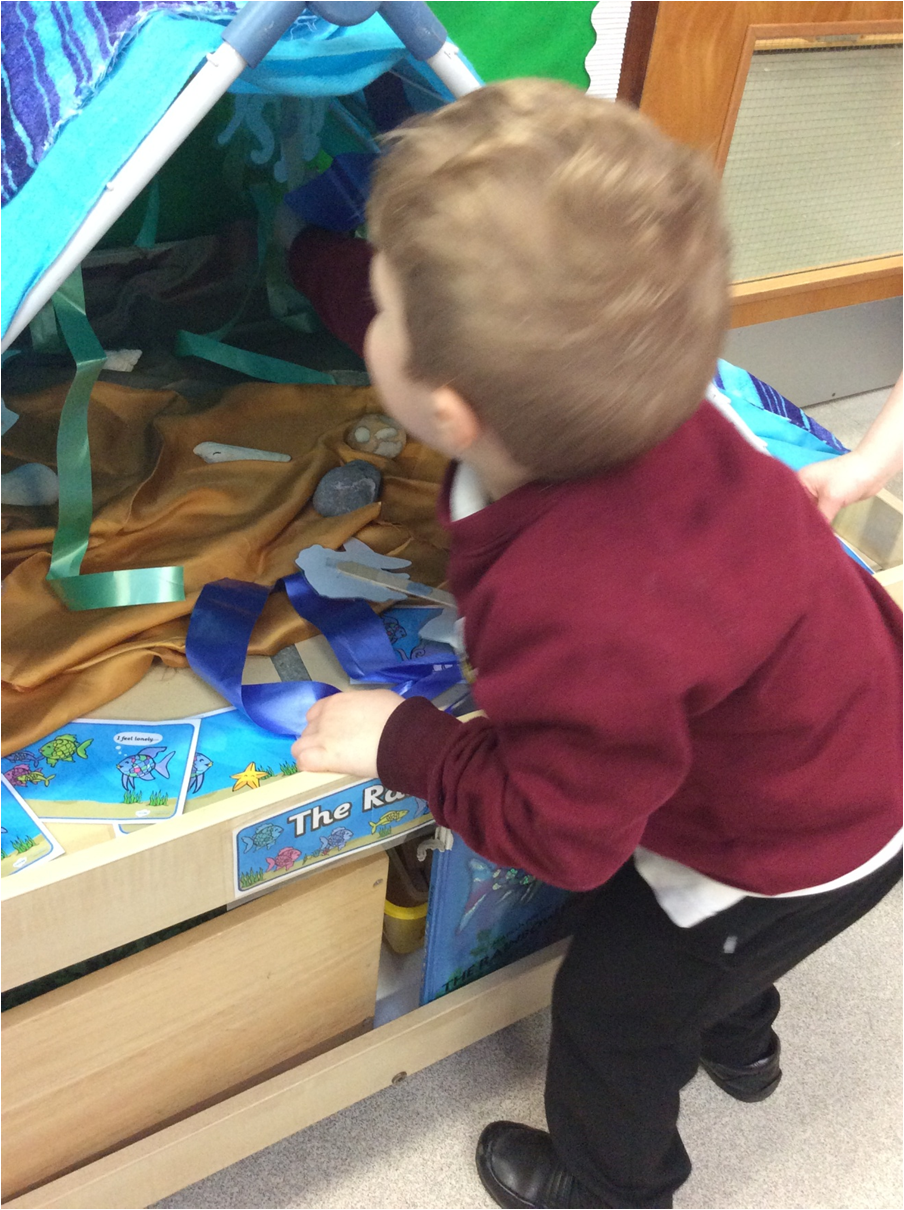
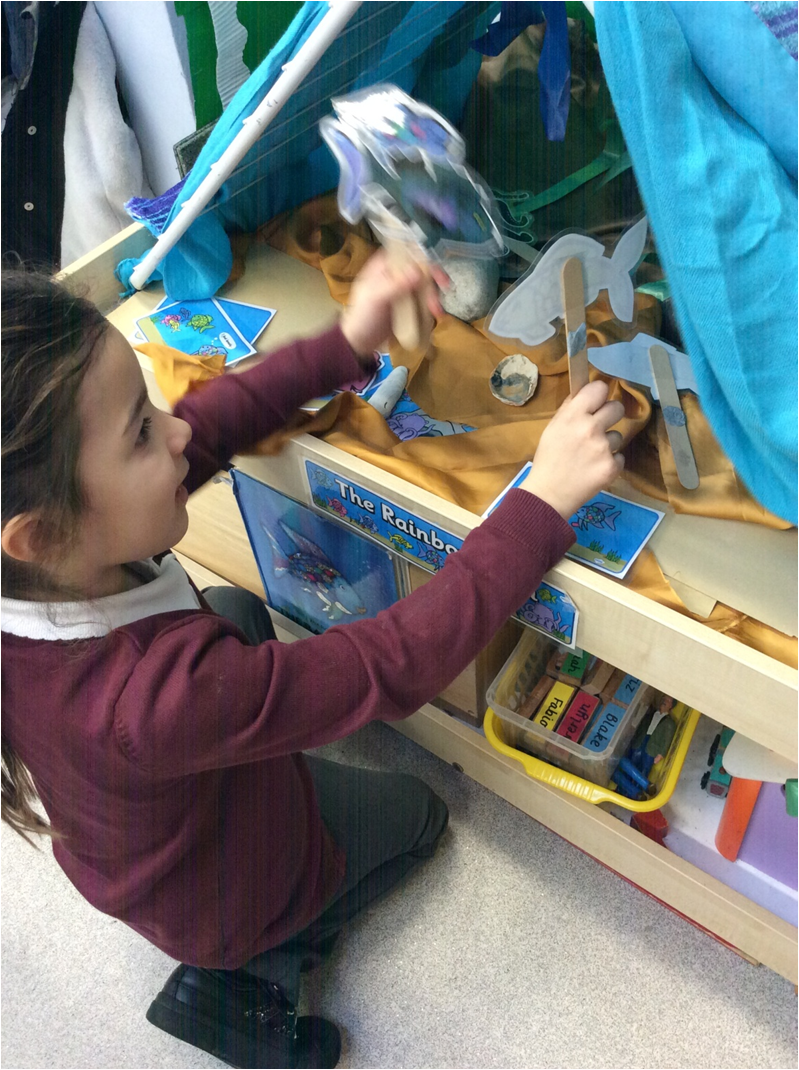
In our small world area we worked together to create an underwater scene using fabric, ribbons, shells, stones and sandpaper. We loved covering the clothes airer so we could retell the story using the stick puppet characters underneath the fabric 'sea'!
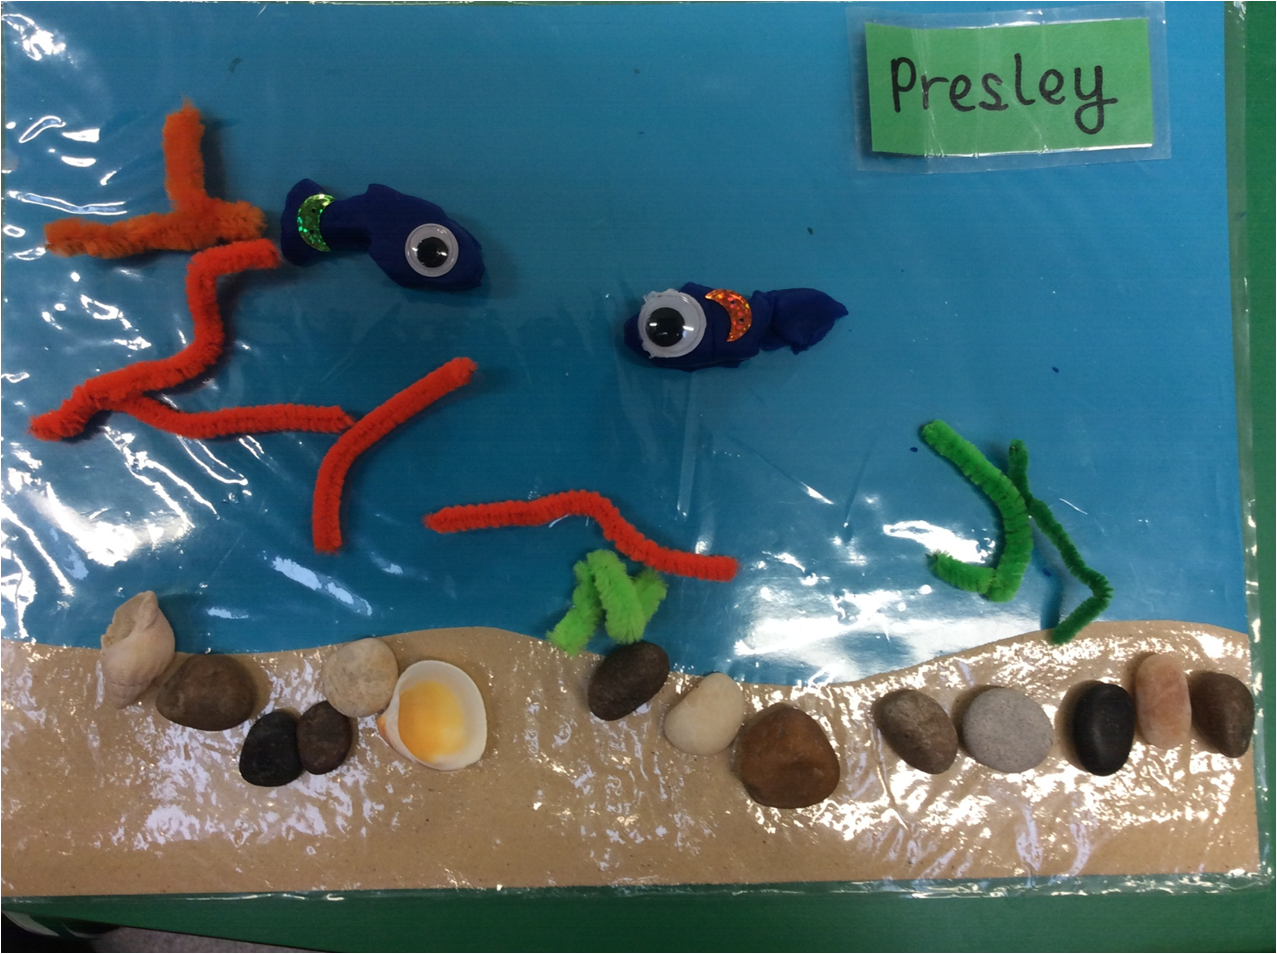
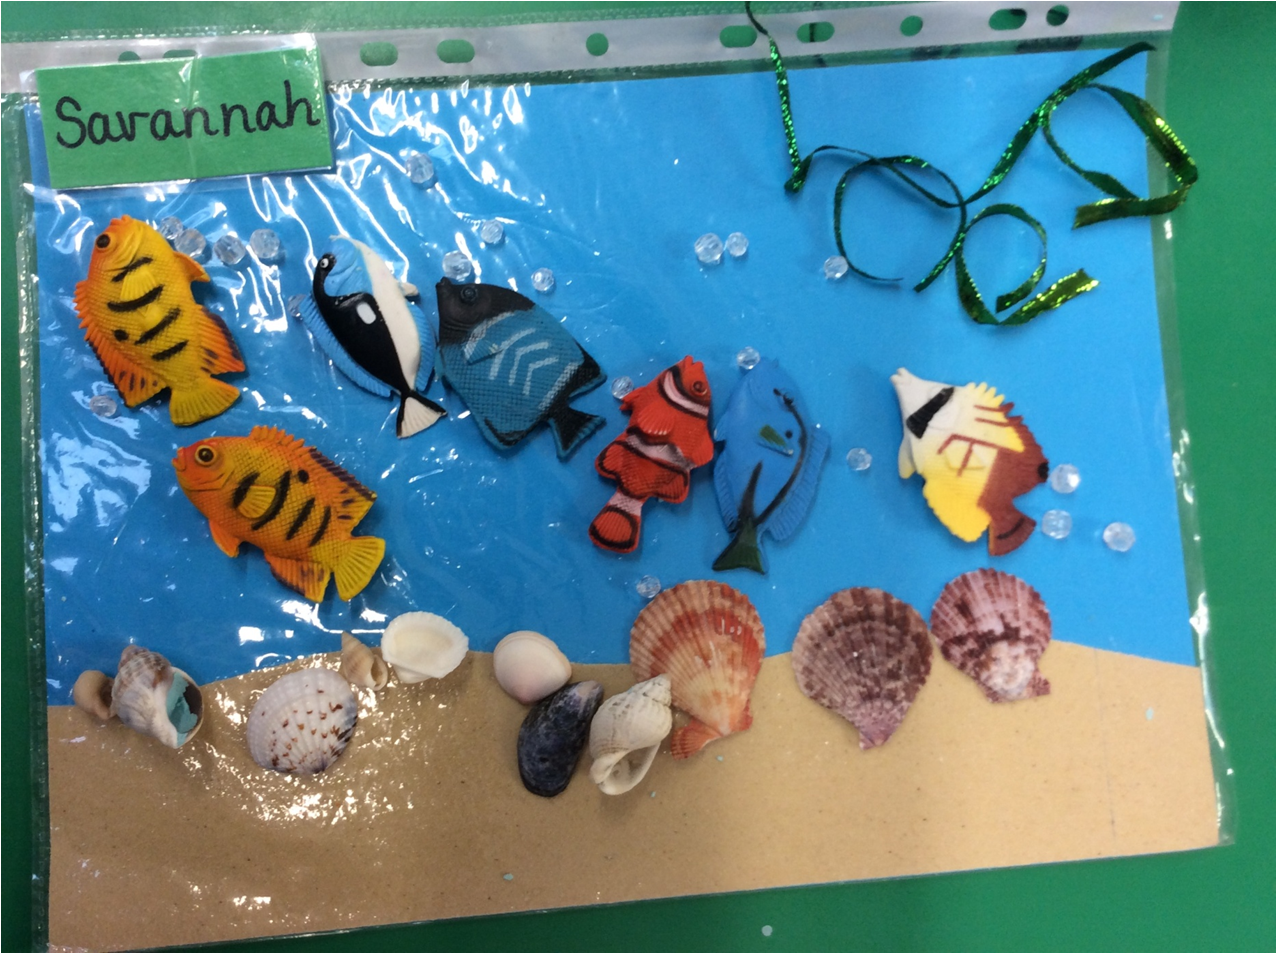
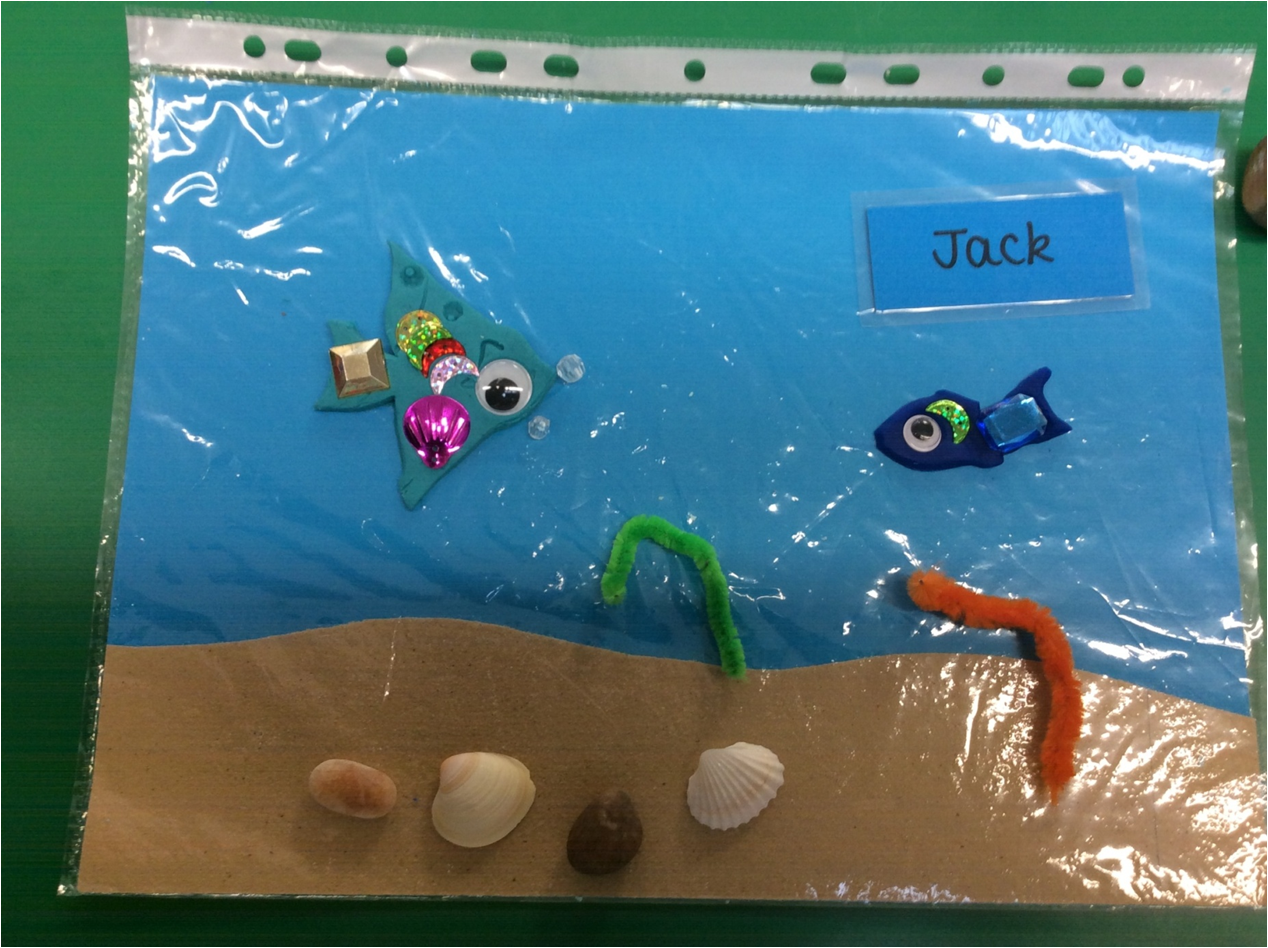
We also created our own underwater scenes in different ways including playdough and collage materials on a blue card background with sandpaper at the bottom to be the sea bed. We took our own photos of the scenes we created.
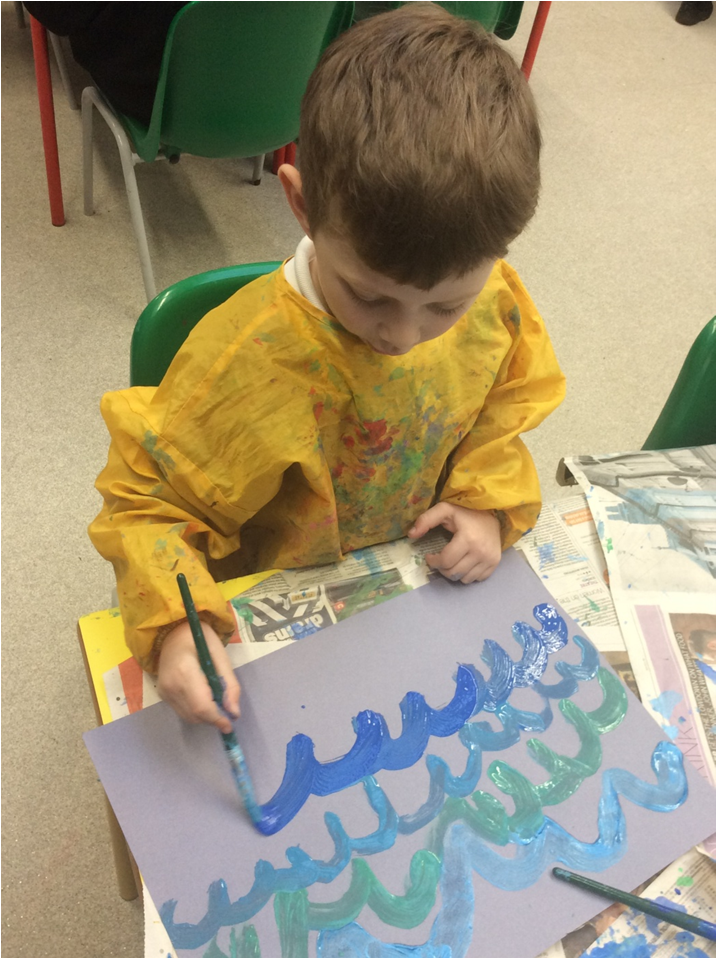
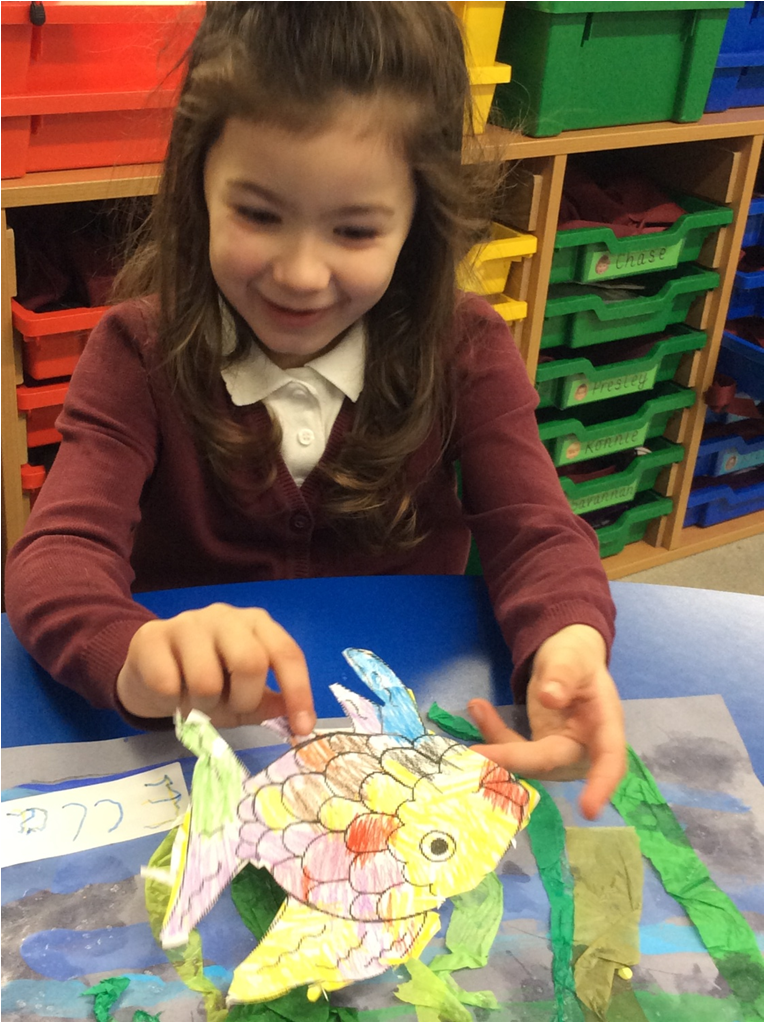
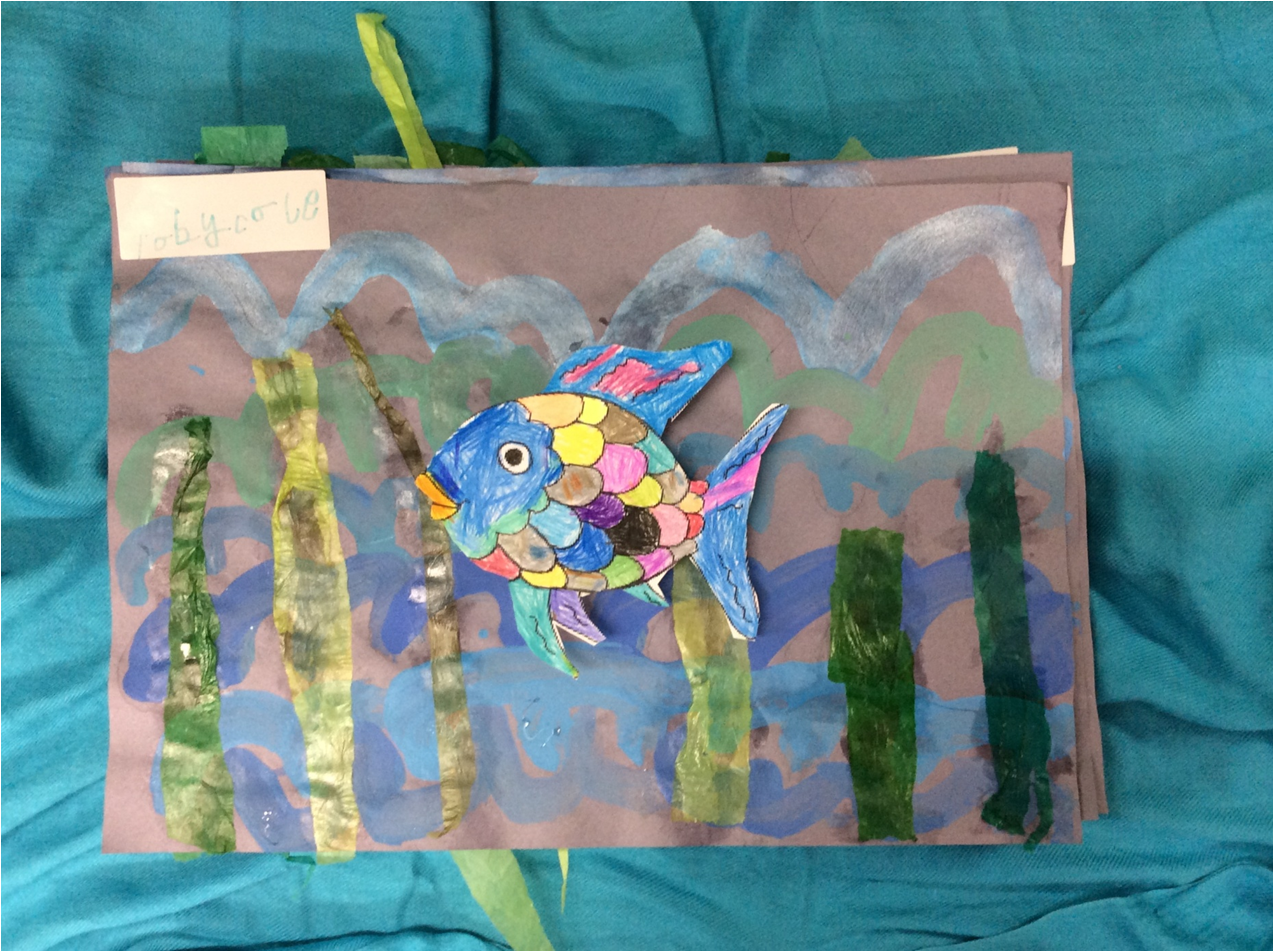
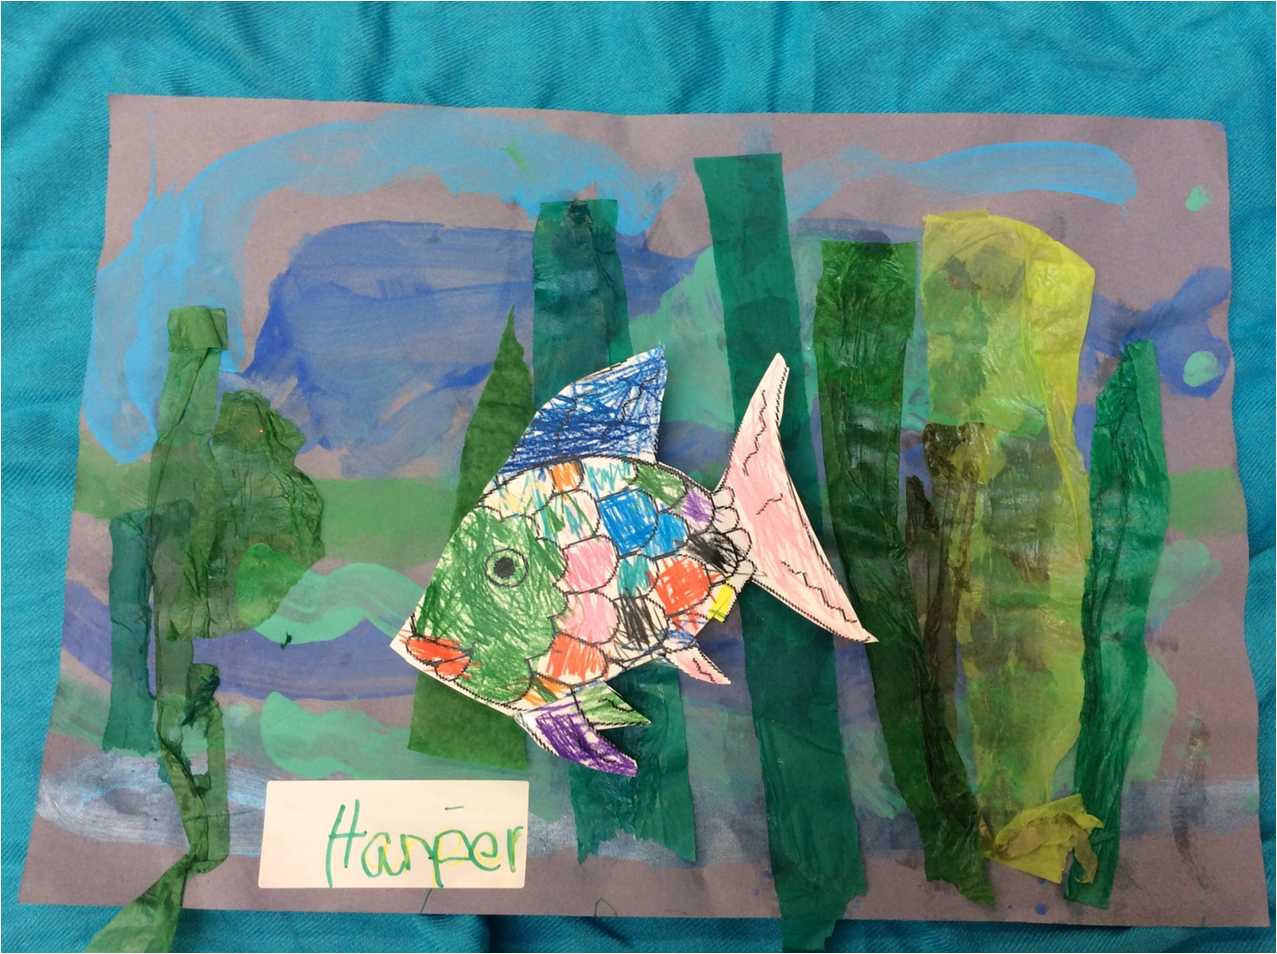
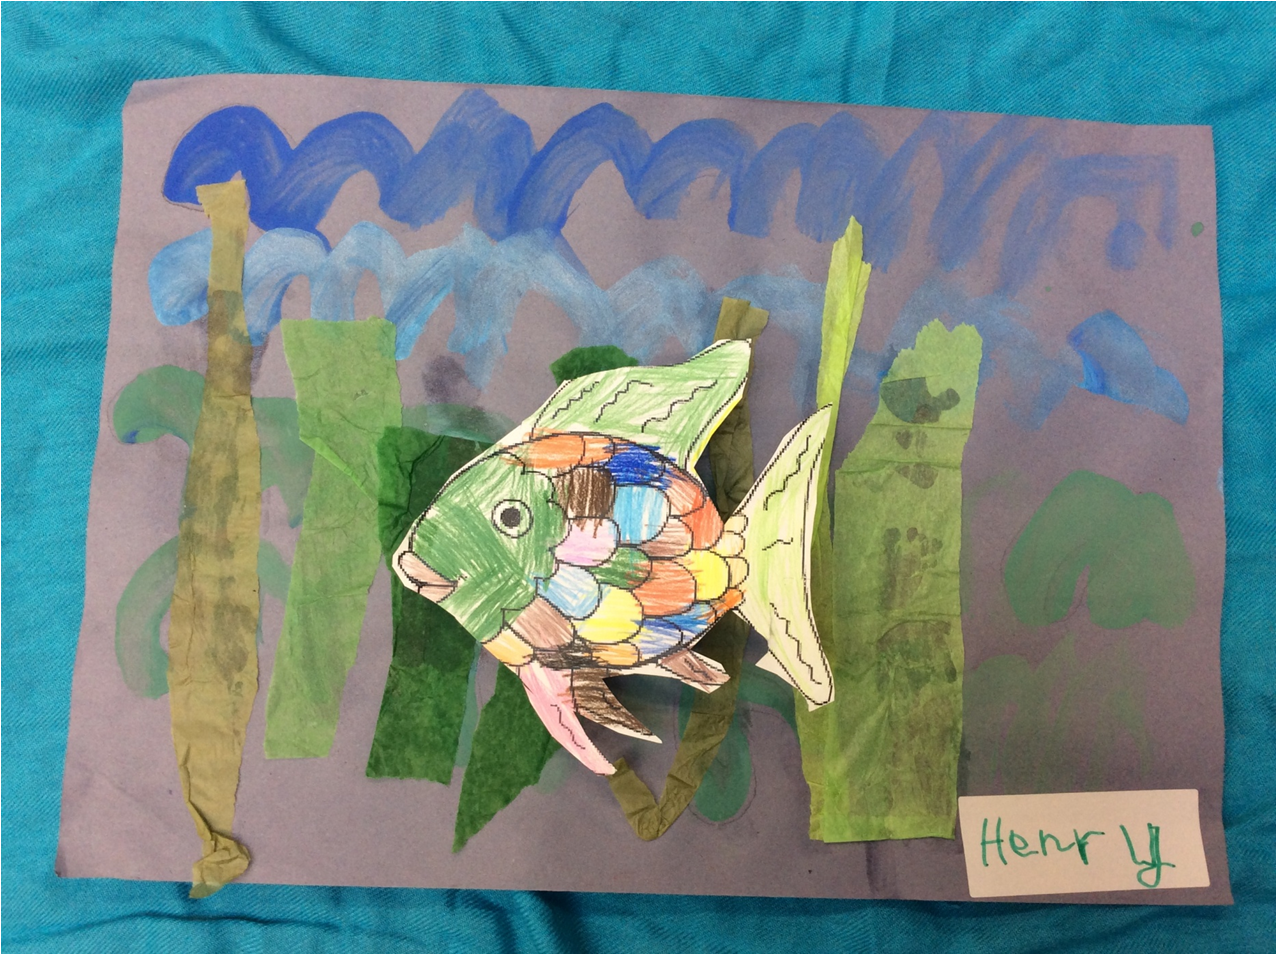
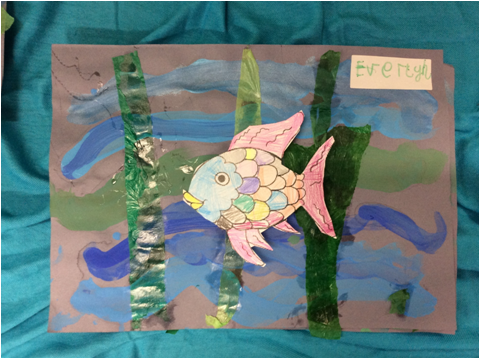
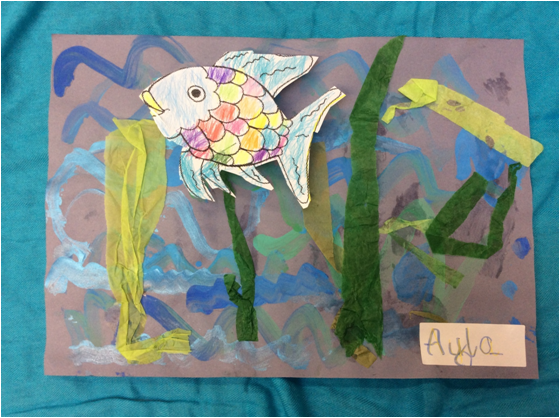
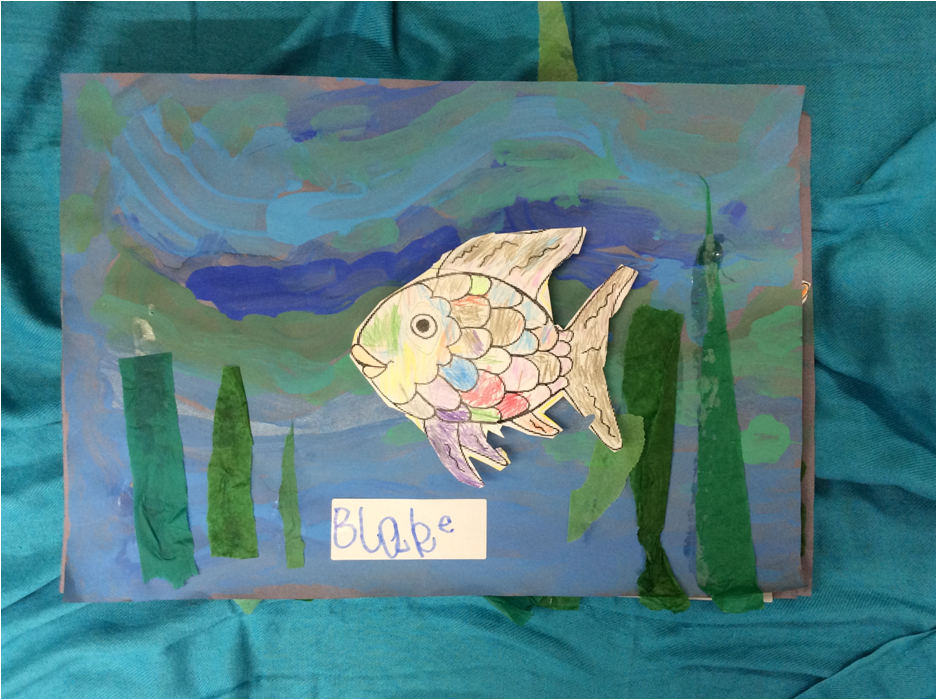
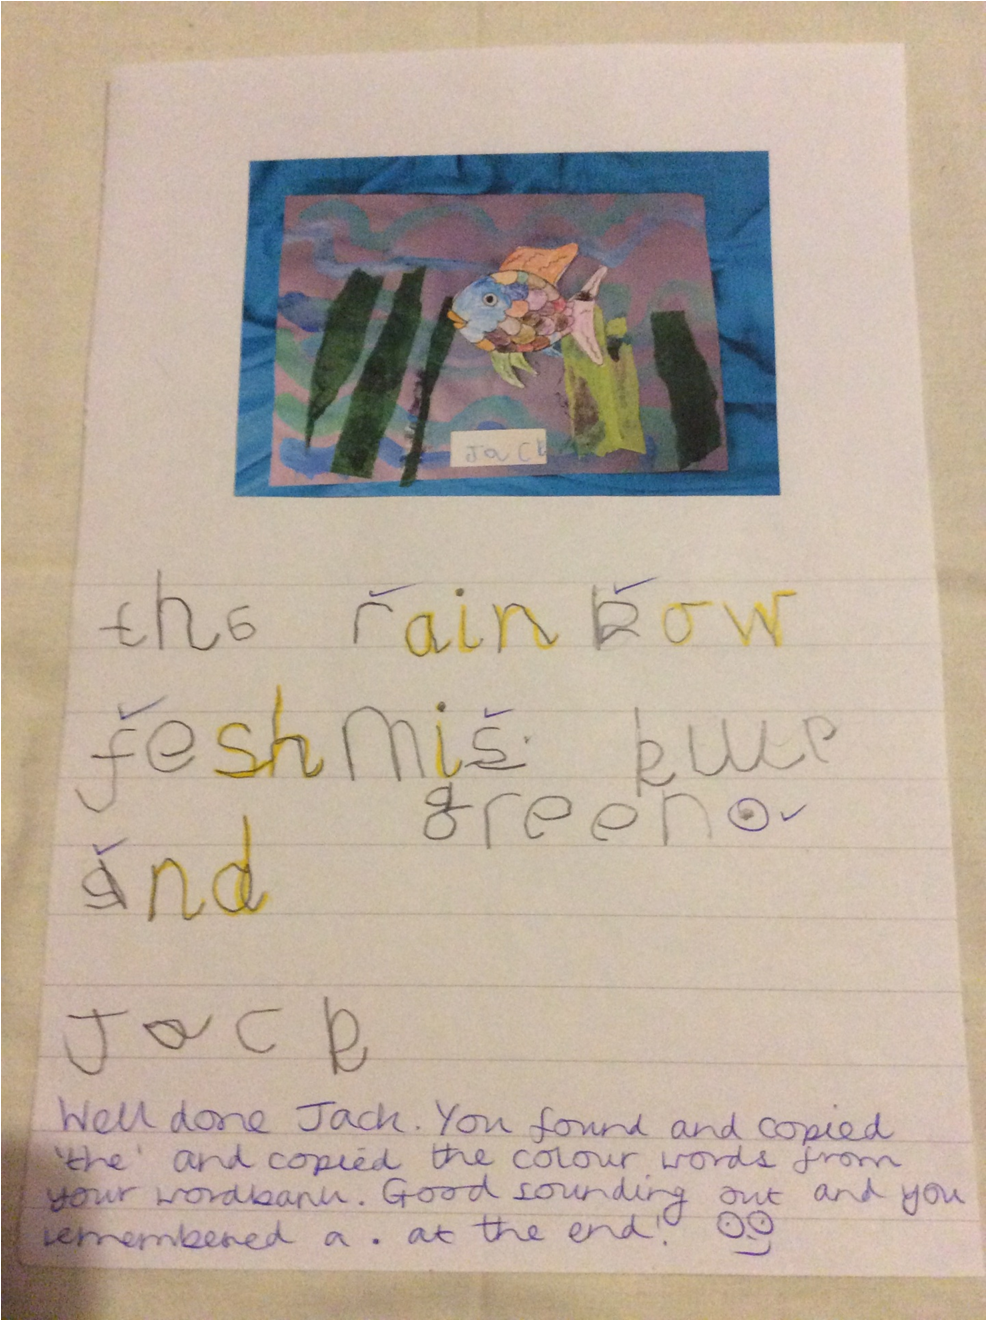
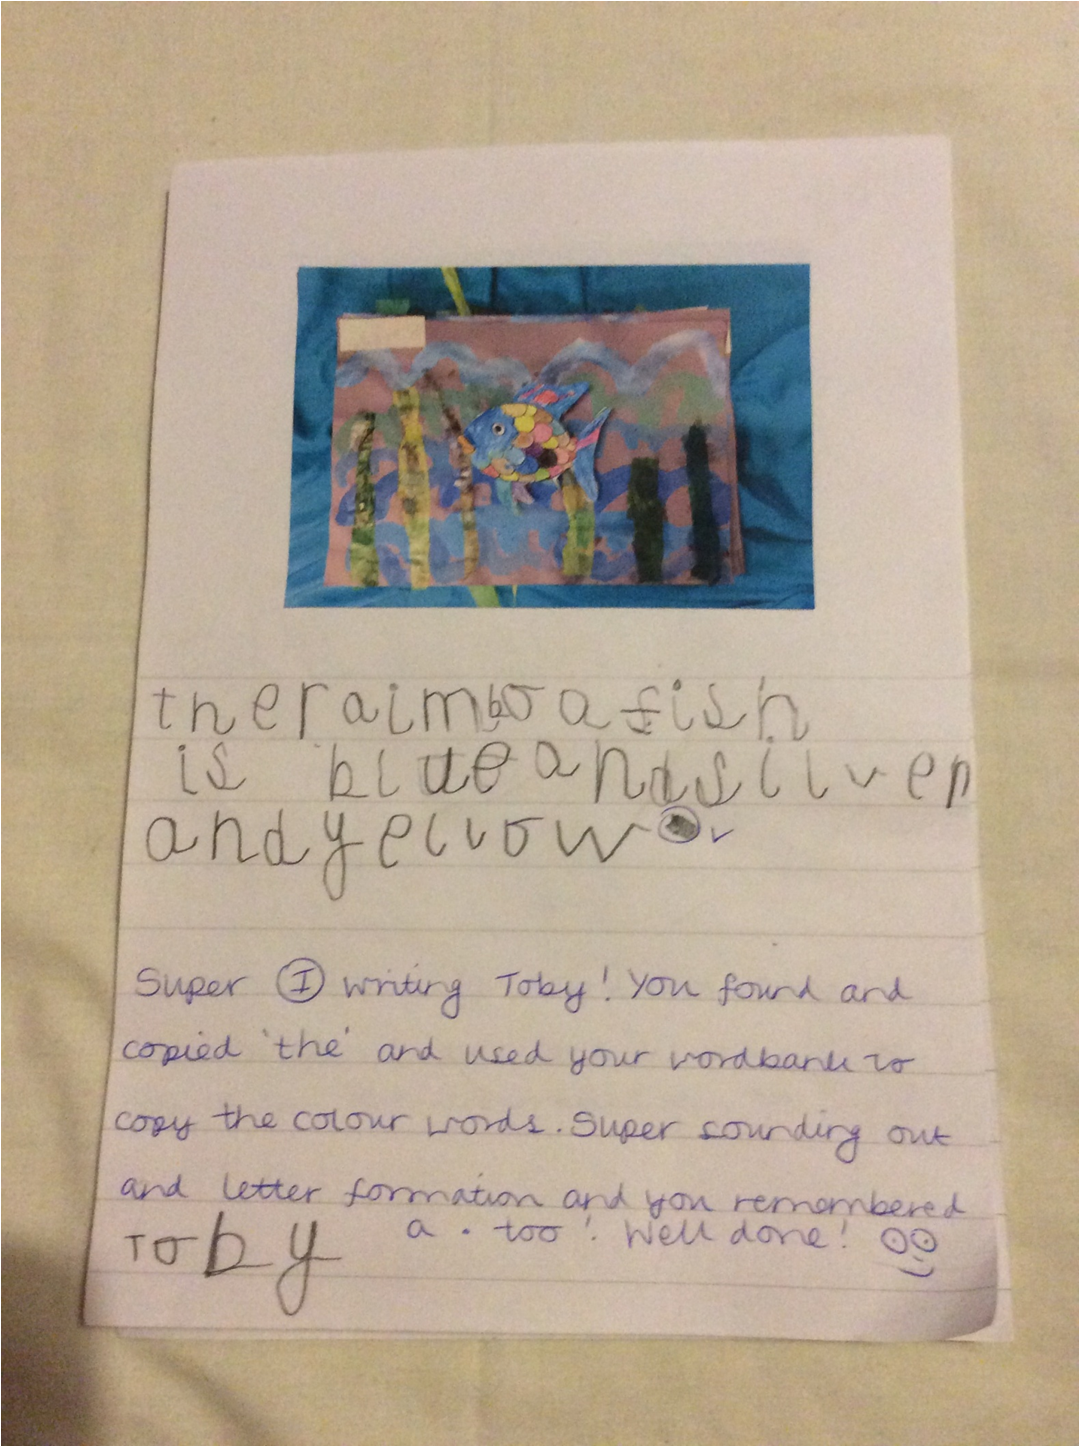
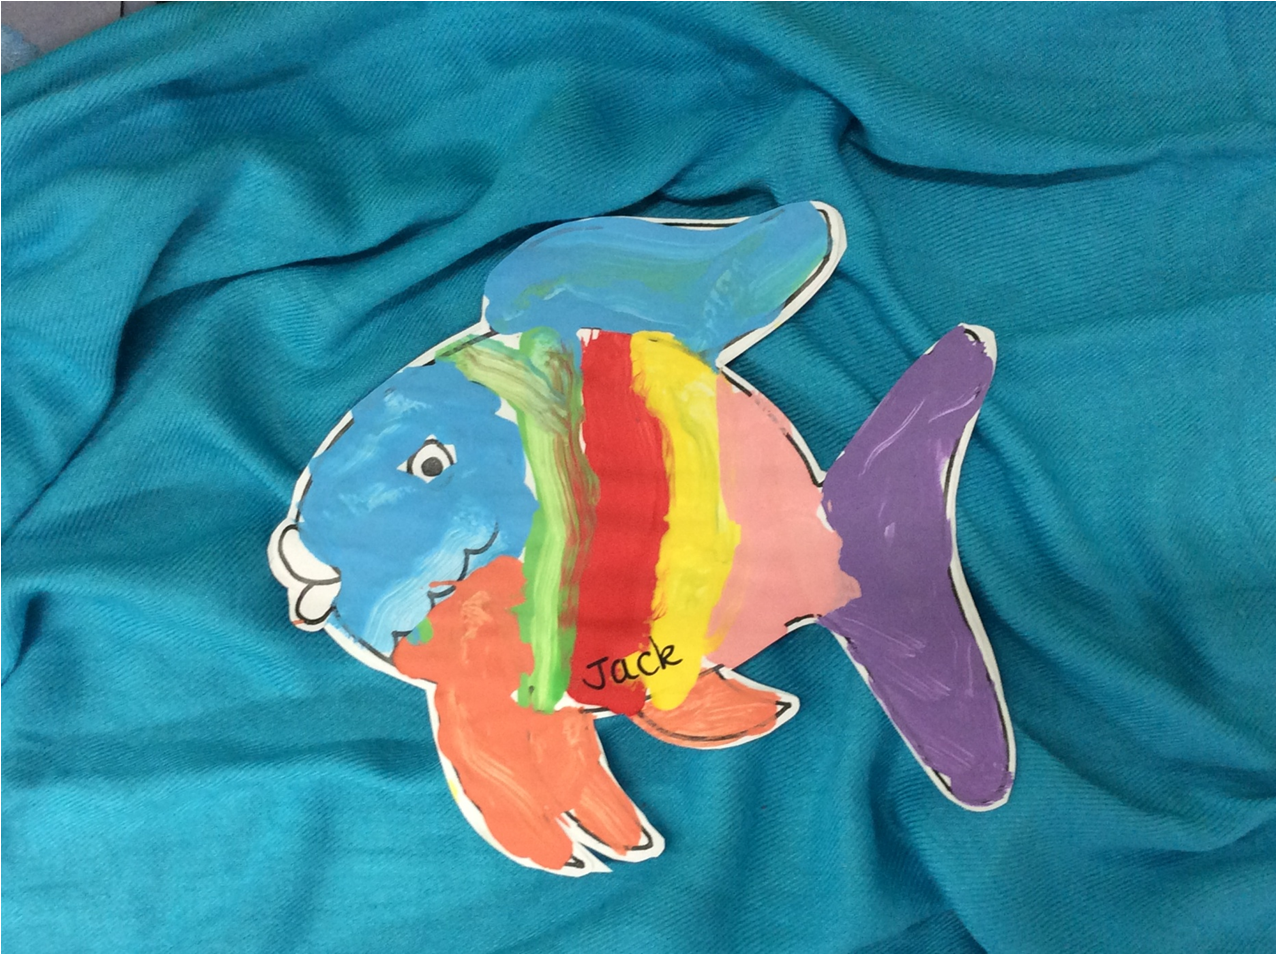
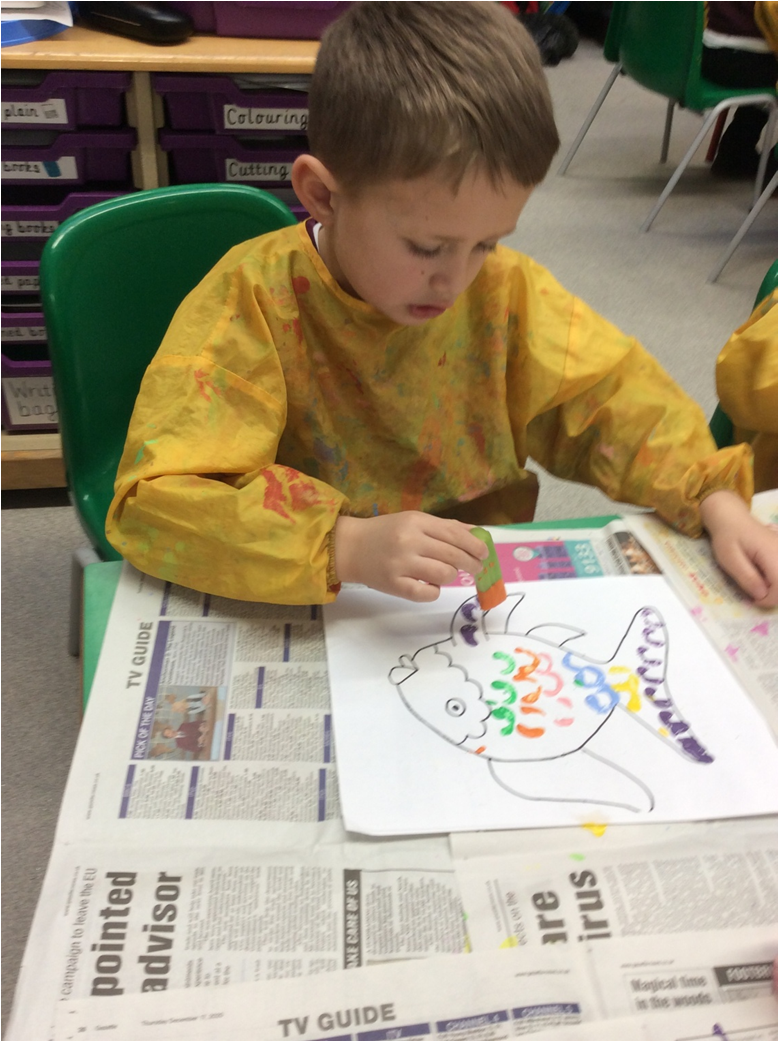
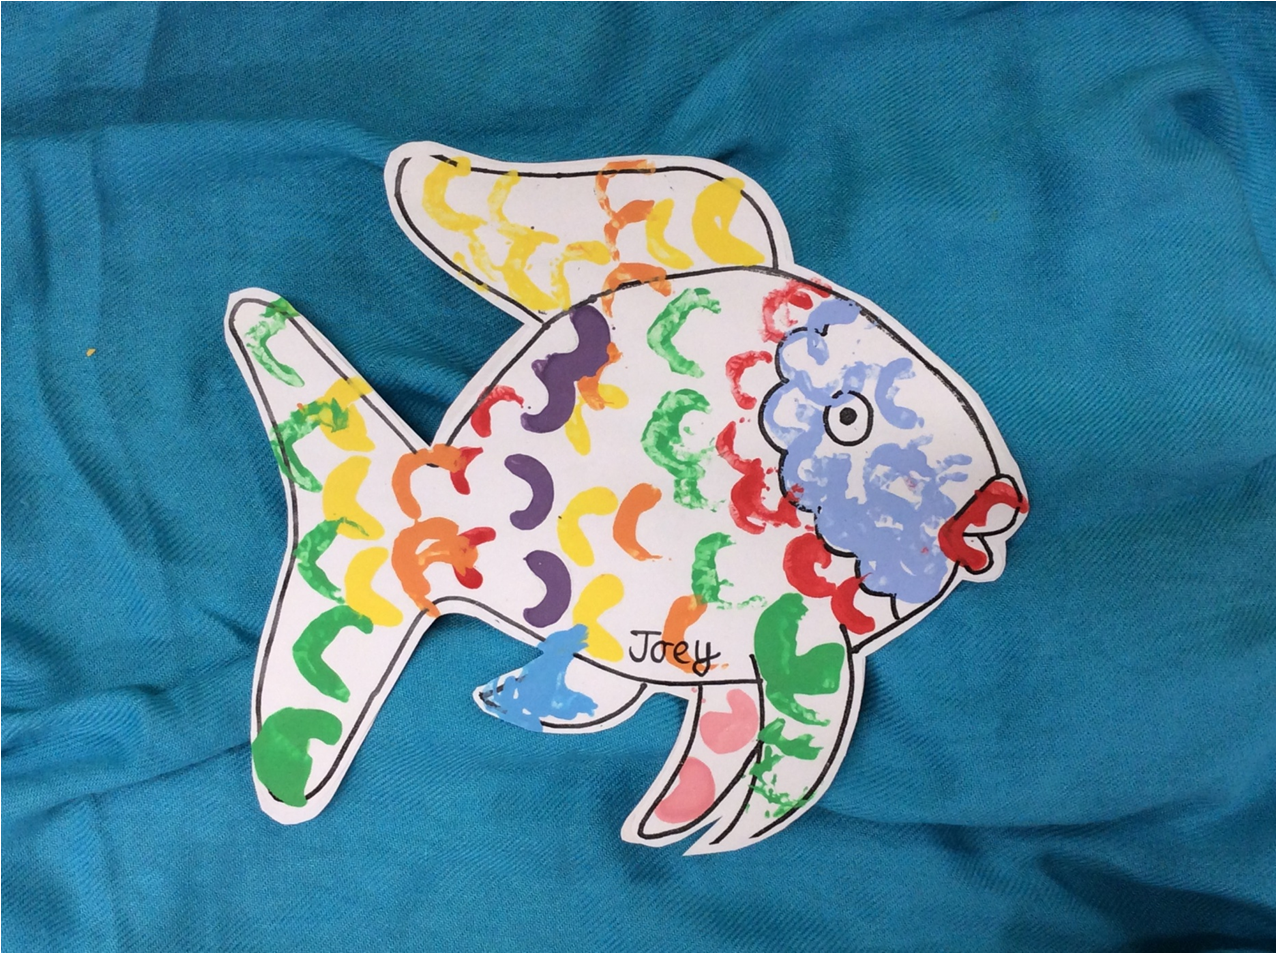
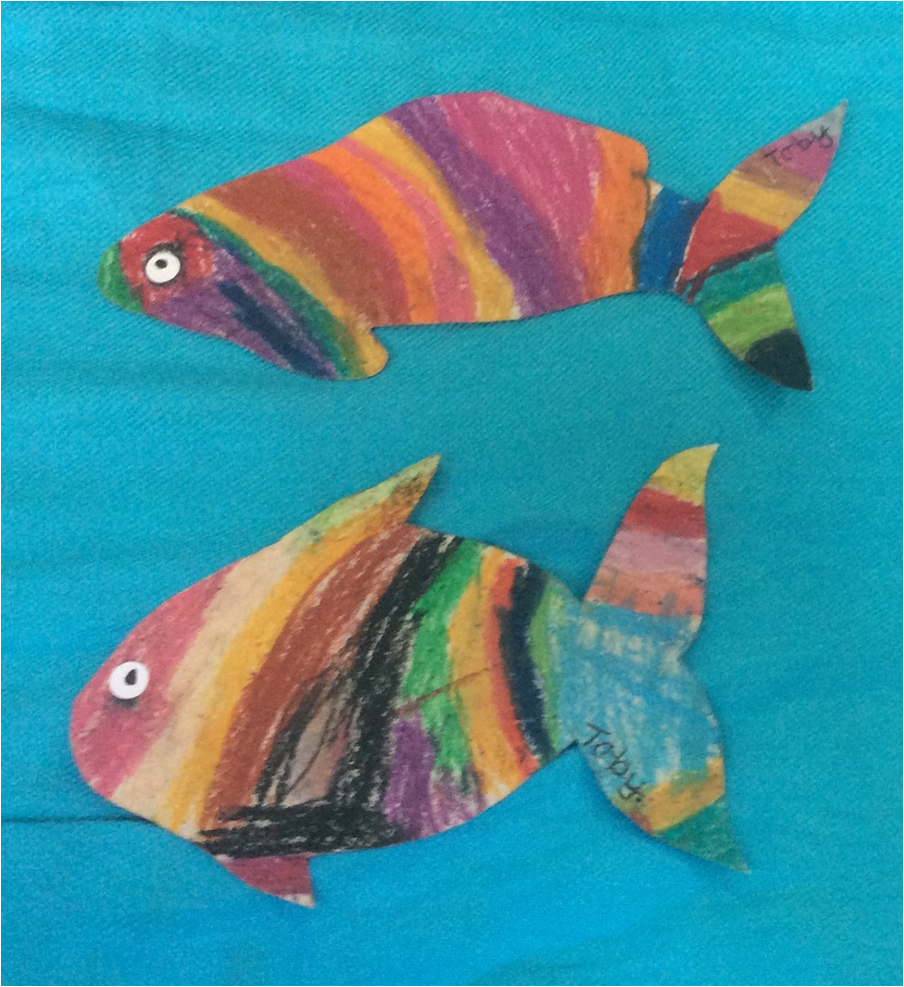
After doing some very careful colouring of our own Rainbow Fish and cutting it out, we made a sea background by painting waves in shades of blue and green paint then adding tissue paper seaweed. Finally, we attached our Rainbow Fish onto the background using a cardboard spring we had made - it made it look as if our fish were swimming amongst the seaweed under the sea!

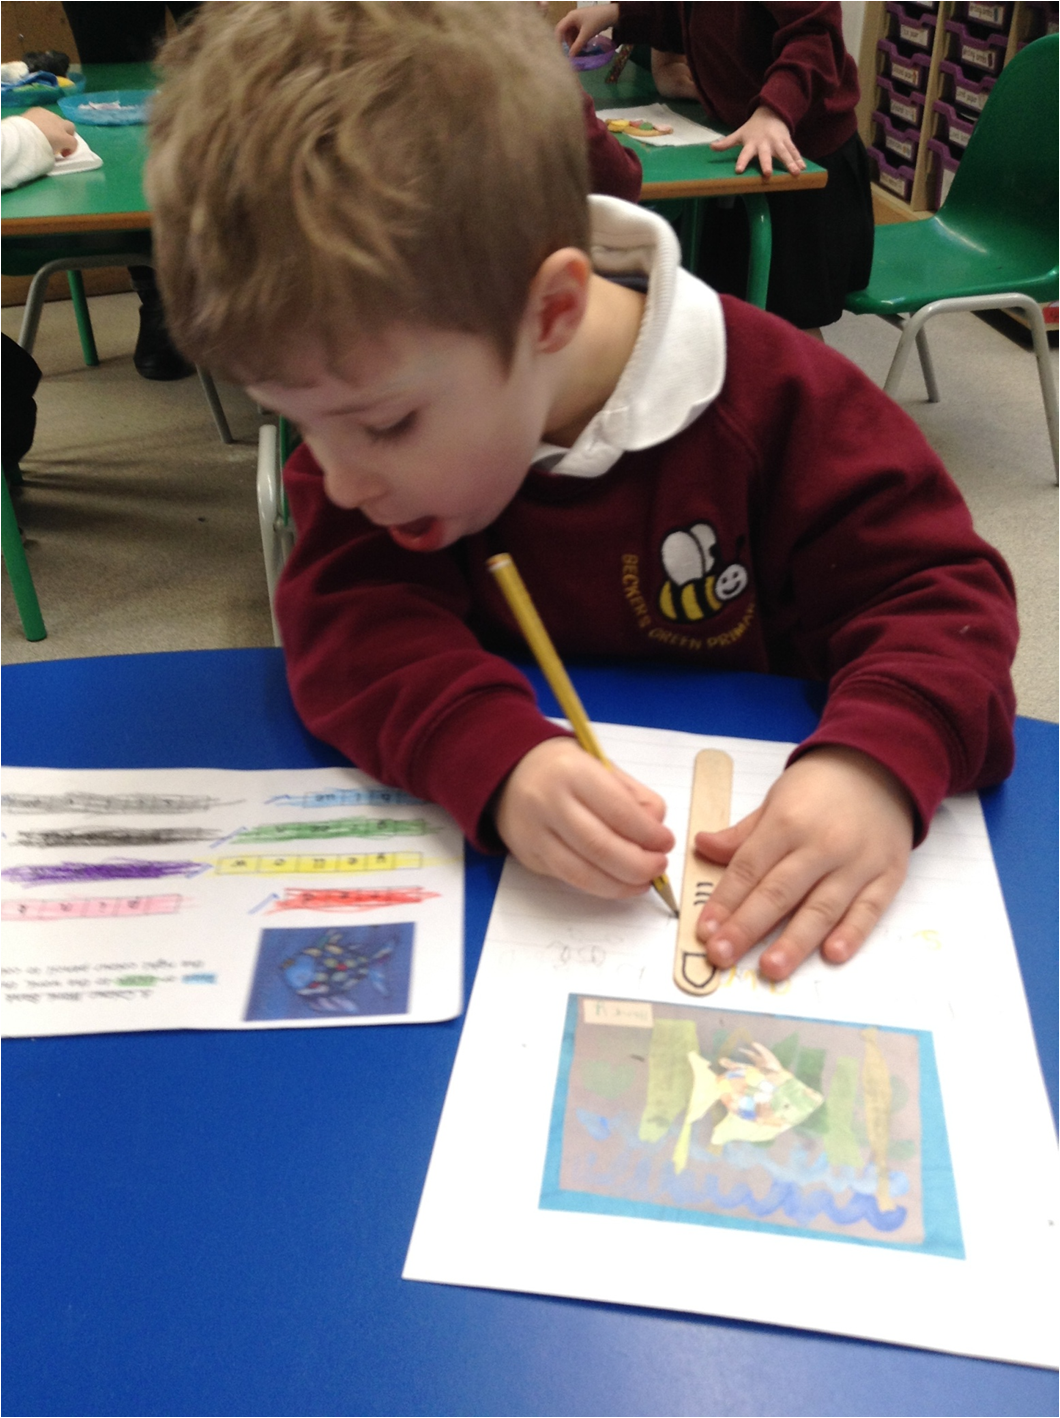
We made our own colour wordbank by sounding out the colour words ourselves or listening to an adult sound them out, then colouring the word in the correct colour. We used these when we wrote a description of the colours we could see in photographs of our Rainbow Fish scenes.
Miss Wheatley displayed all our writing on our writing wall - it looked lovely and shows how we are improving our writing skills by sounding out words we want to write, using our finger spacer sticks to make spaces between words, trying to form our letters neatly and remembering to put a full stop at the end!
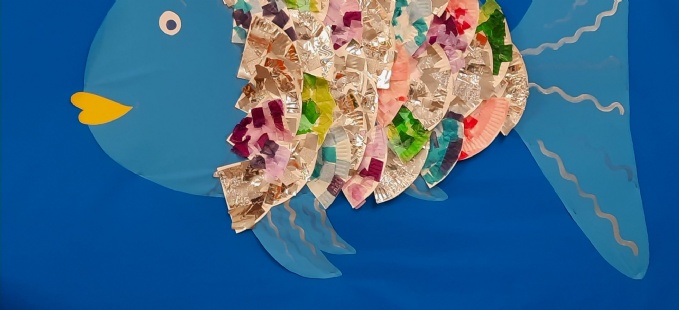
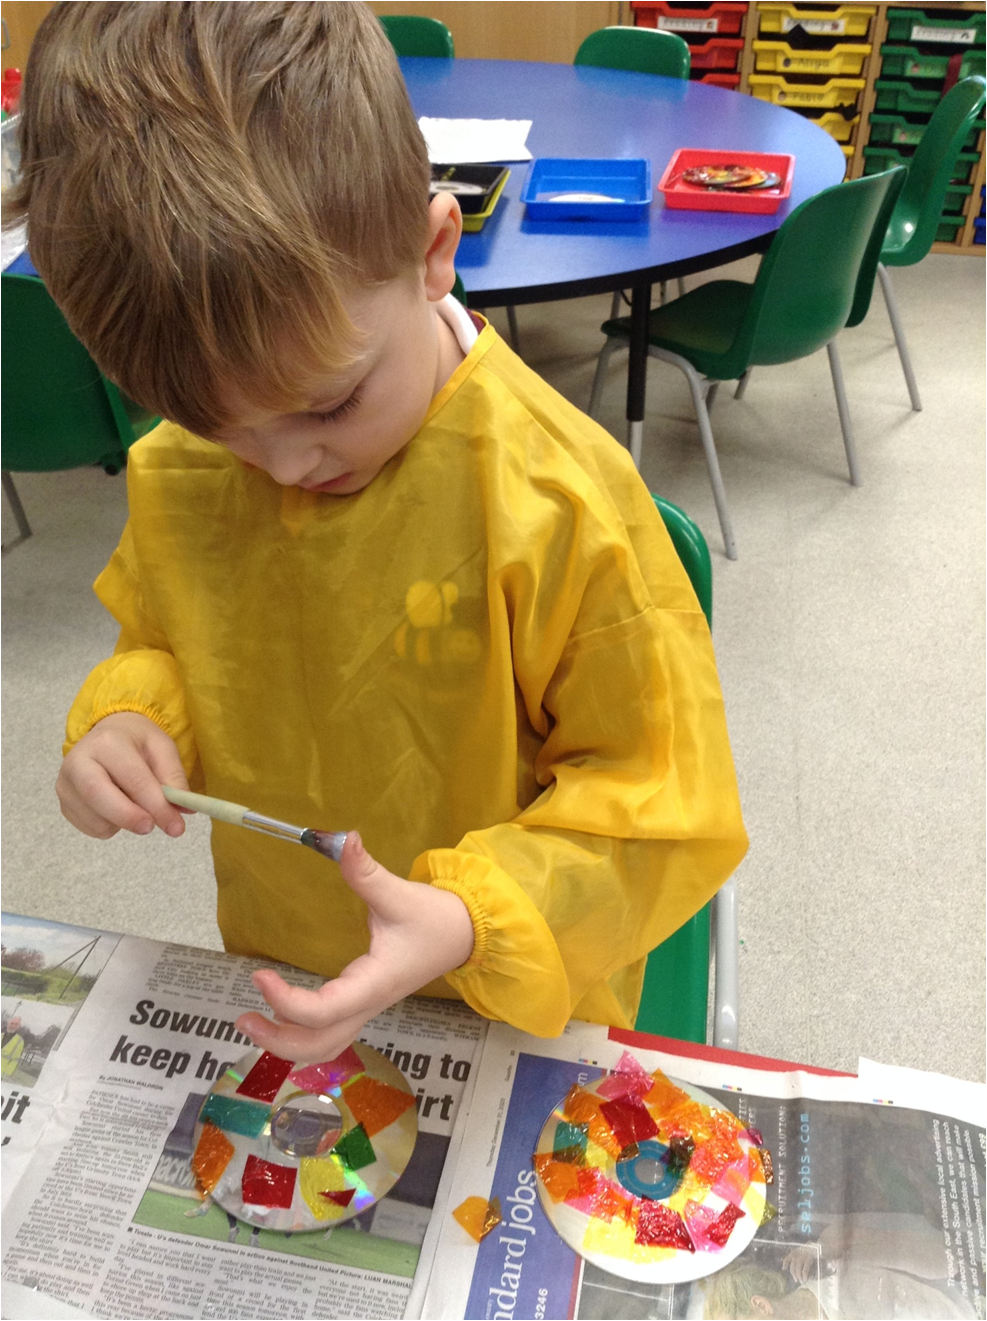
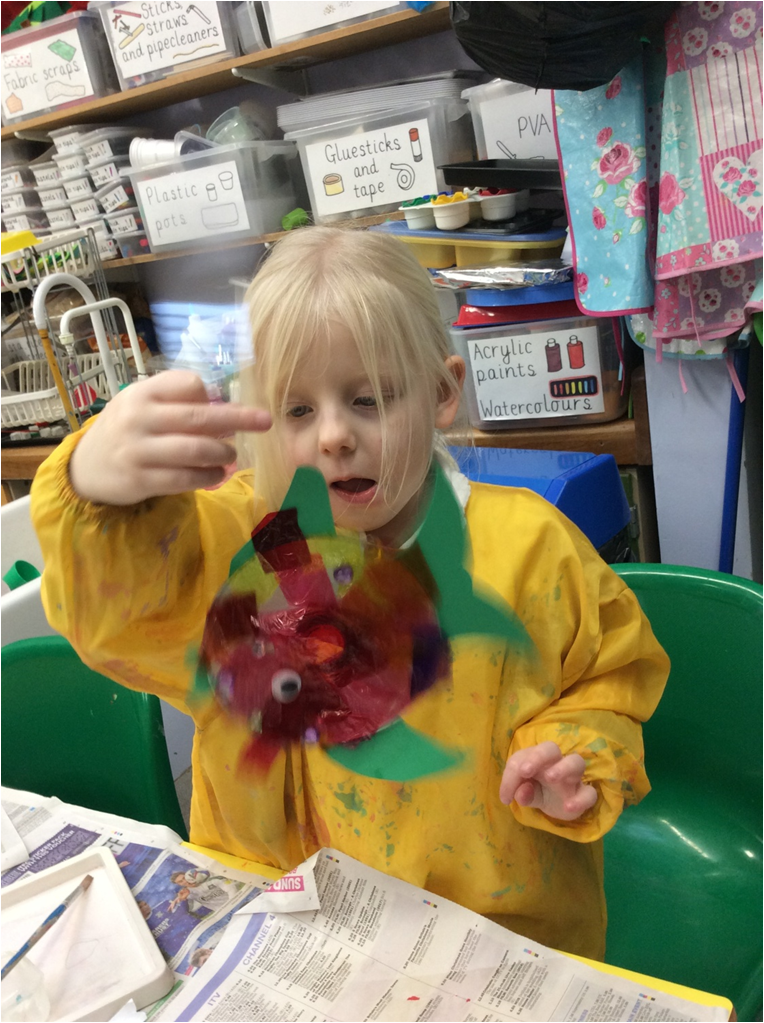
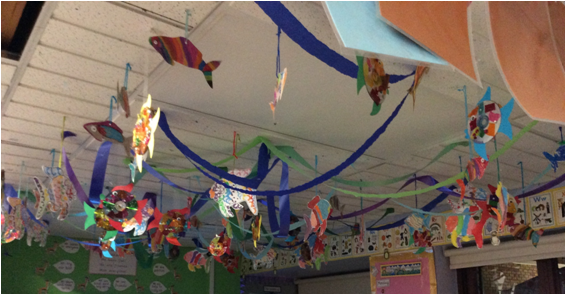
Above our carpet area we made another underwater scene with colourful fish. We painted stripey fish and printed another using celery to make a scale effect then these were glued together to make double-sided fish. We used bright pastels on both sides of fish outlines then added sticker eyes - pastels are a bit messy, but we love the colours! Our final project to create this display was to make fish from old CDs and collage materials including sweet wrappers. When we had finished decorating two CDs we glued on fins, lips and a tail before glueing the two pieces together. Once the googly eyes were added our fish were ready to hang up! We love sitting underneath our fish art!
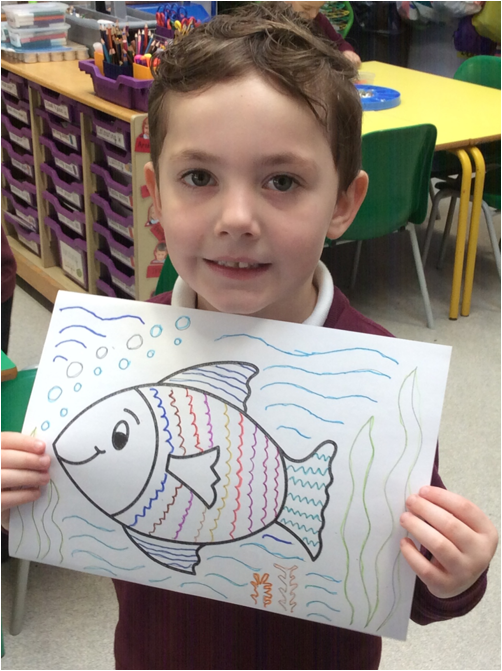
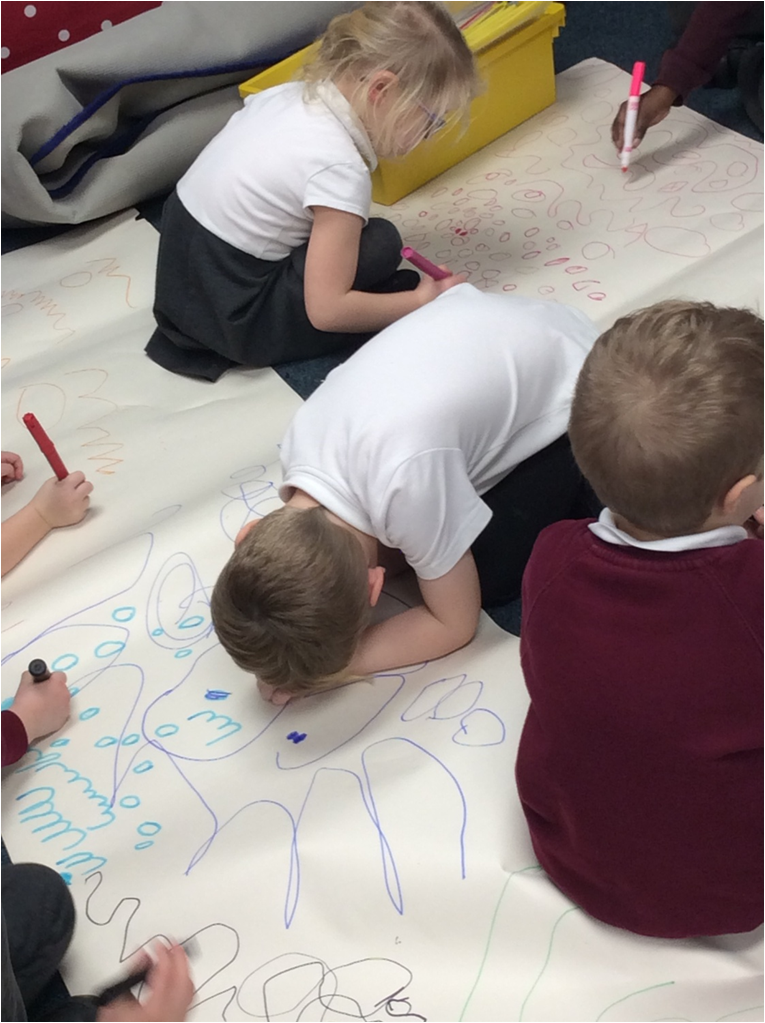
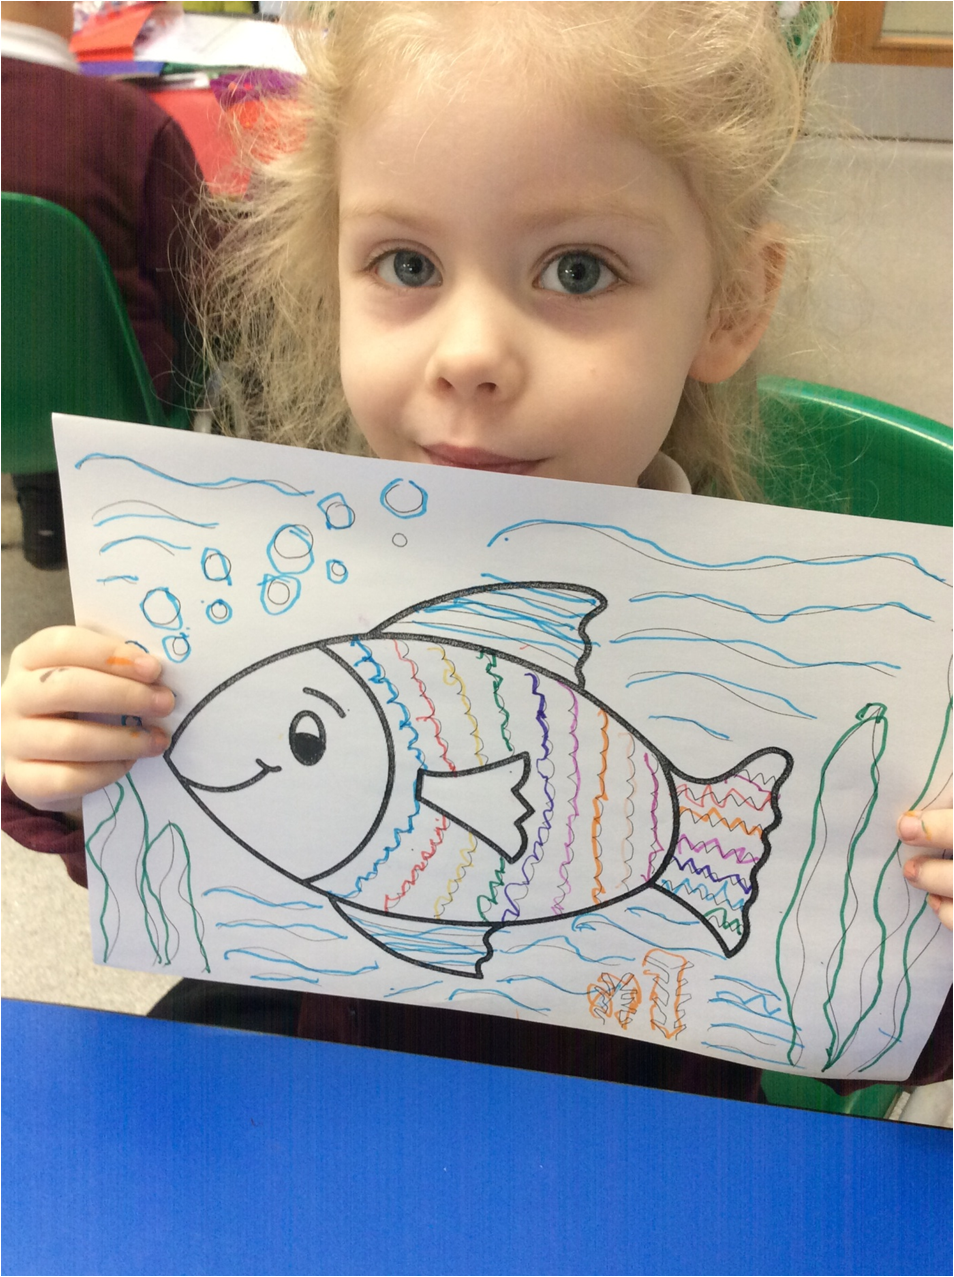
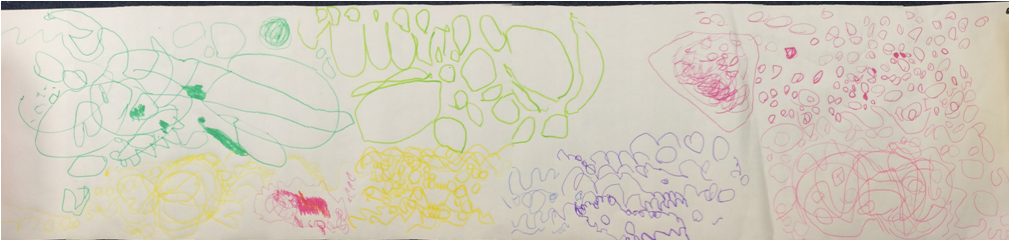
We used felt tip pens to trace over patterns on a fish outline, and in our Pen Disco we drew waves and bubbles as we listened to 'The Aquarium' by Saint Saens.
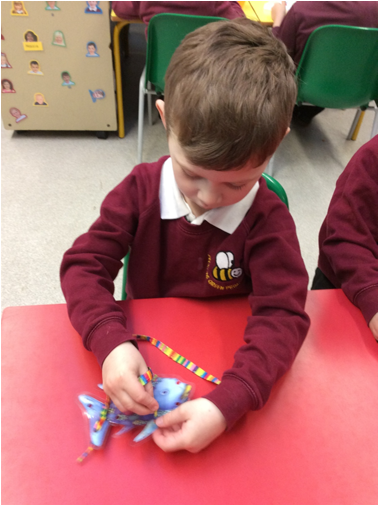
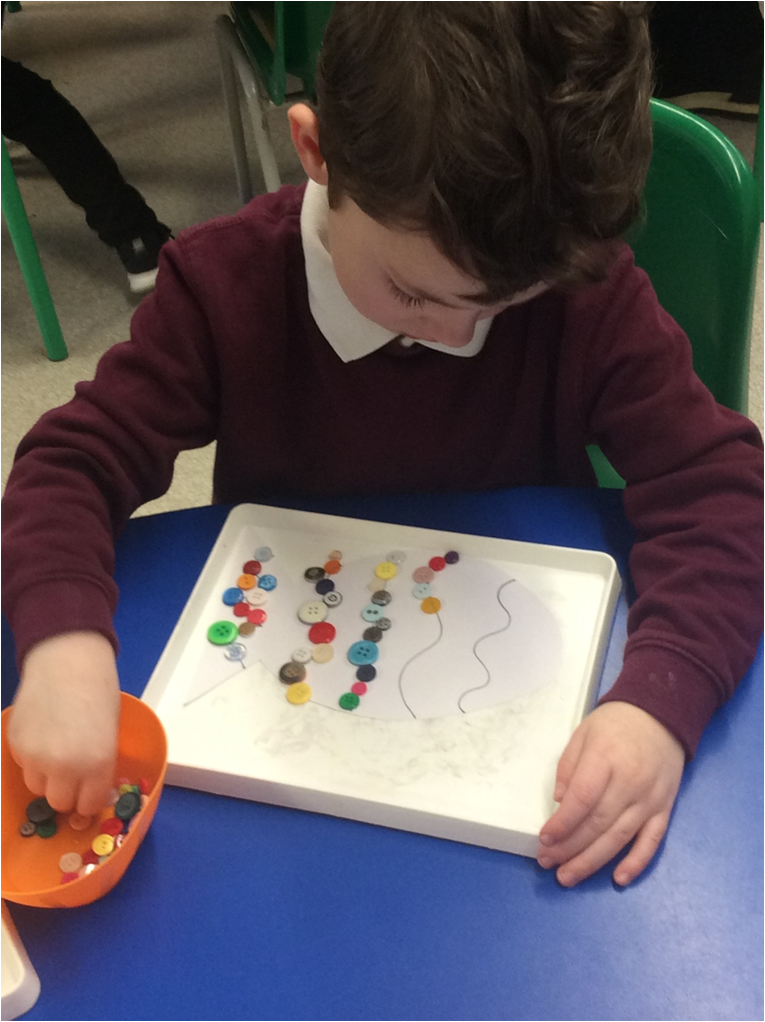
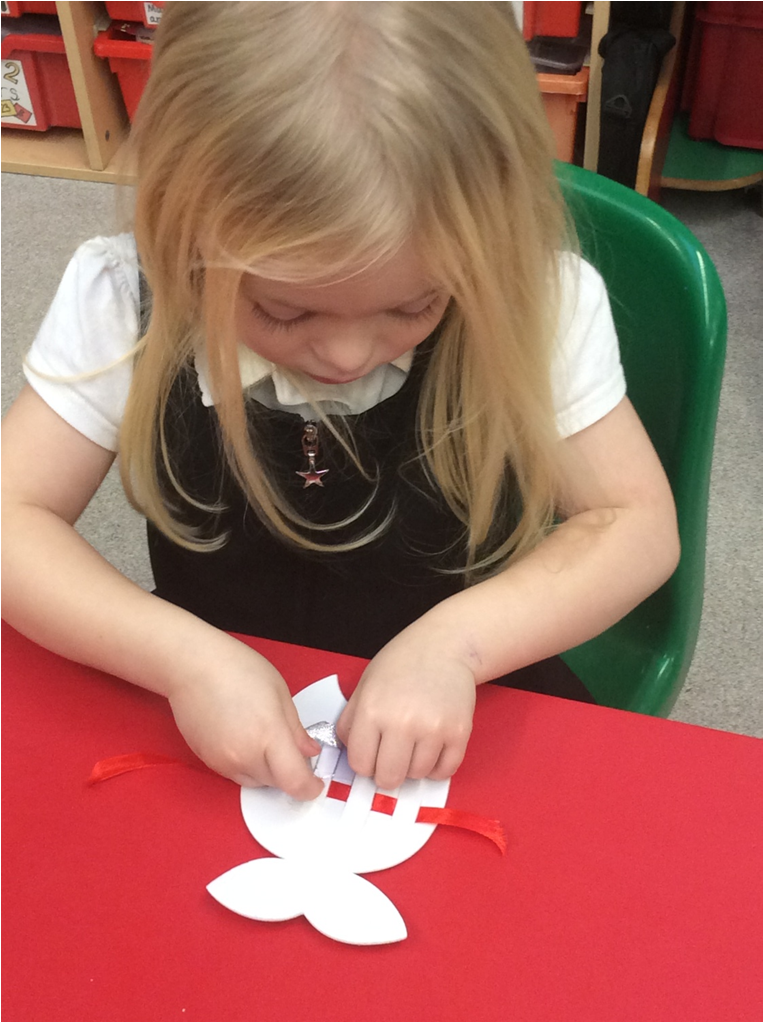
Our fingers also got a workout when we did some fish-themed fine motor activities including threading, weaving and placing buttons along lines to create a pattern.
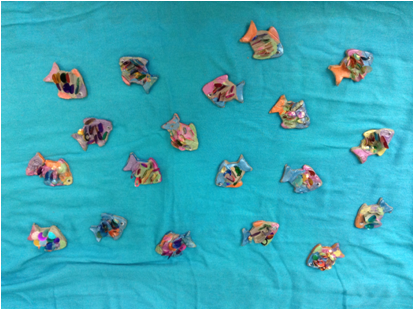
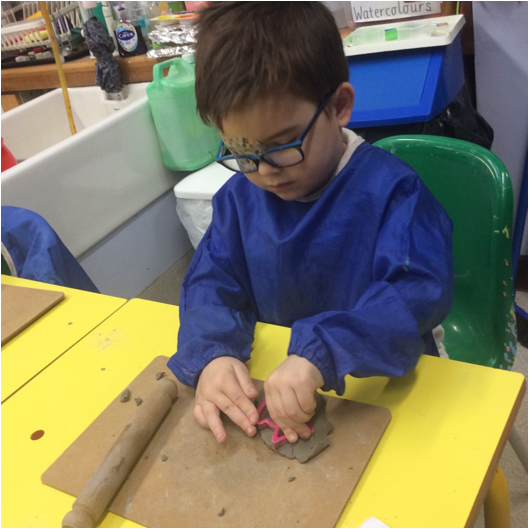
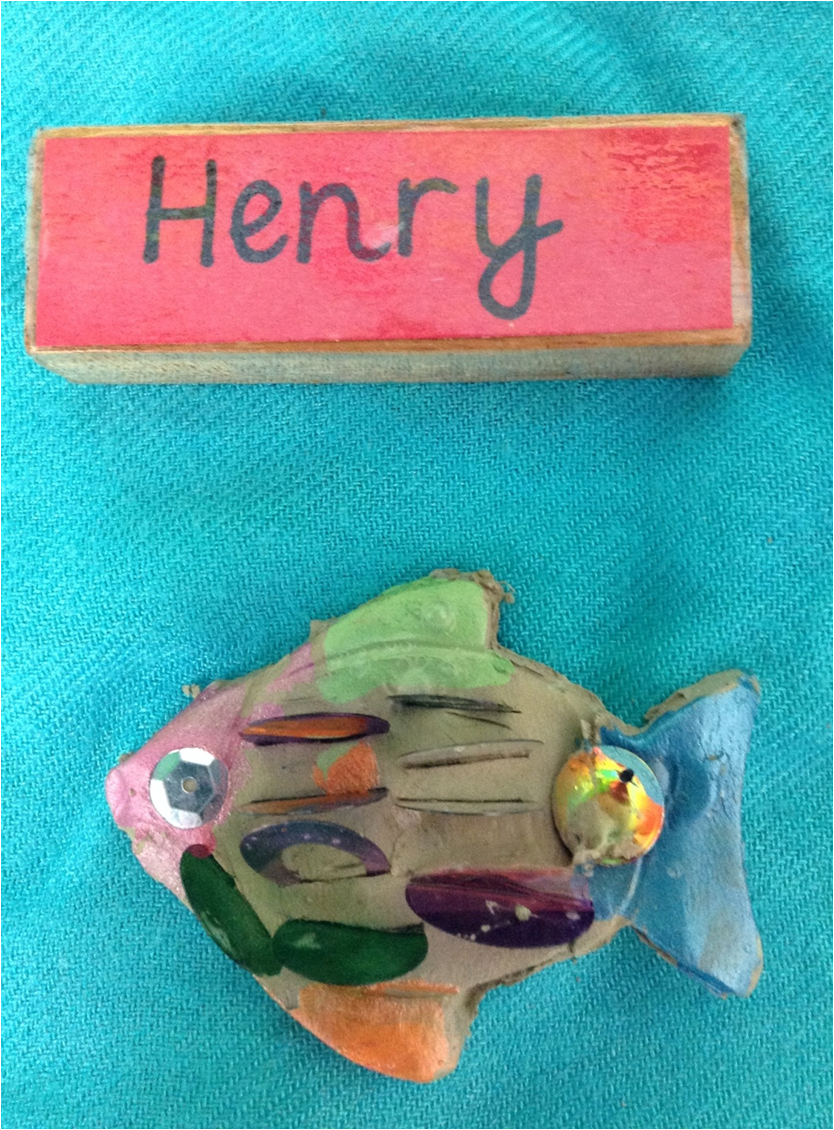
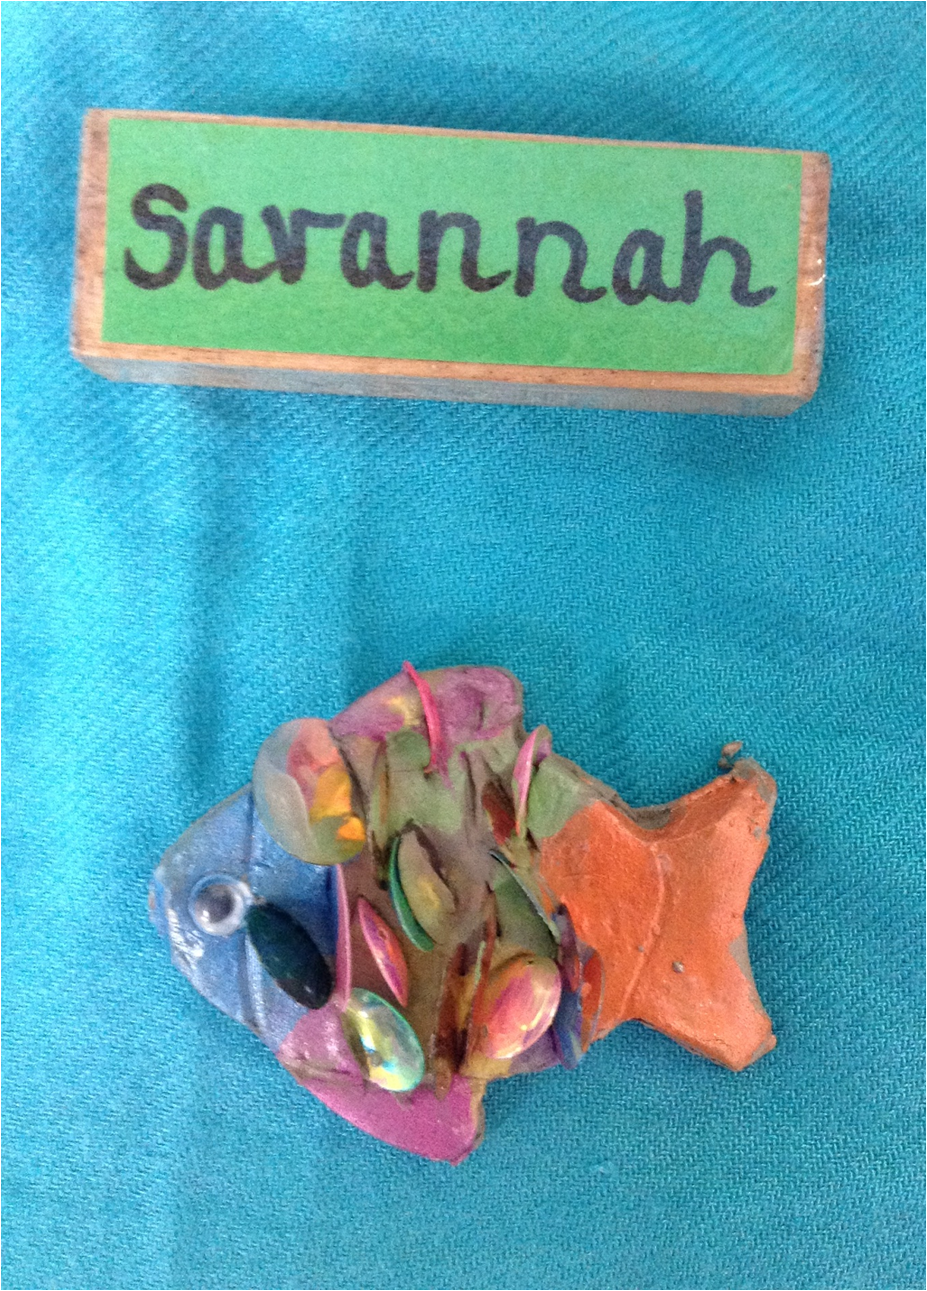
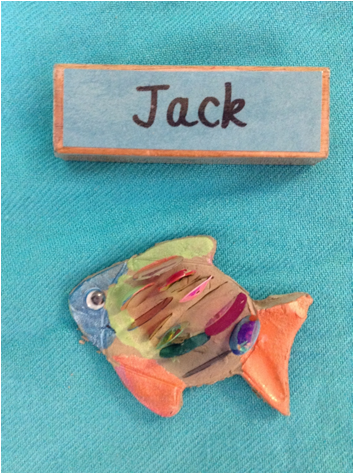
We needed our muscles in our fingers, hands and arms when we used clay to make fish as it is a lot harder to work with than playdough. We warmed it up first by squeezing and squashing it then rolled it out before using a fish-shaped cutter. Next we pushed shiny sequins into the clay to create scales and left them to dry. After that we used metallic paints and tiny paintbrushes to colour the fins, tail and head, being careful not to paint over our sequins!
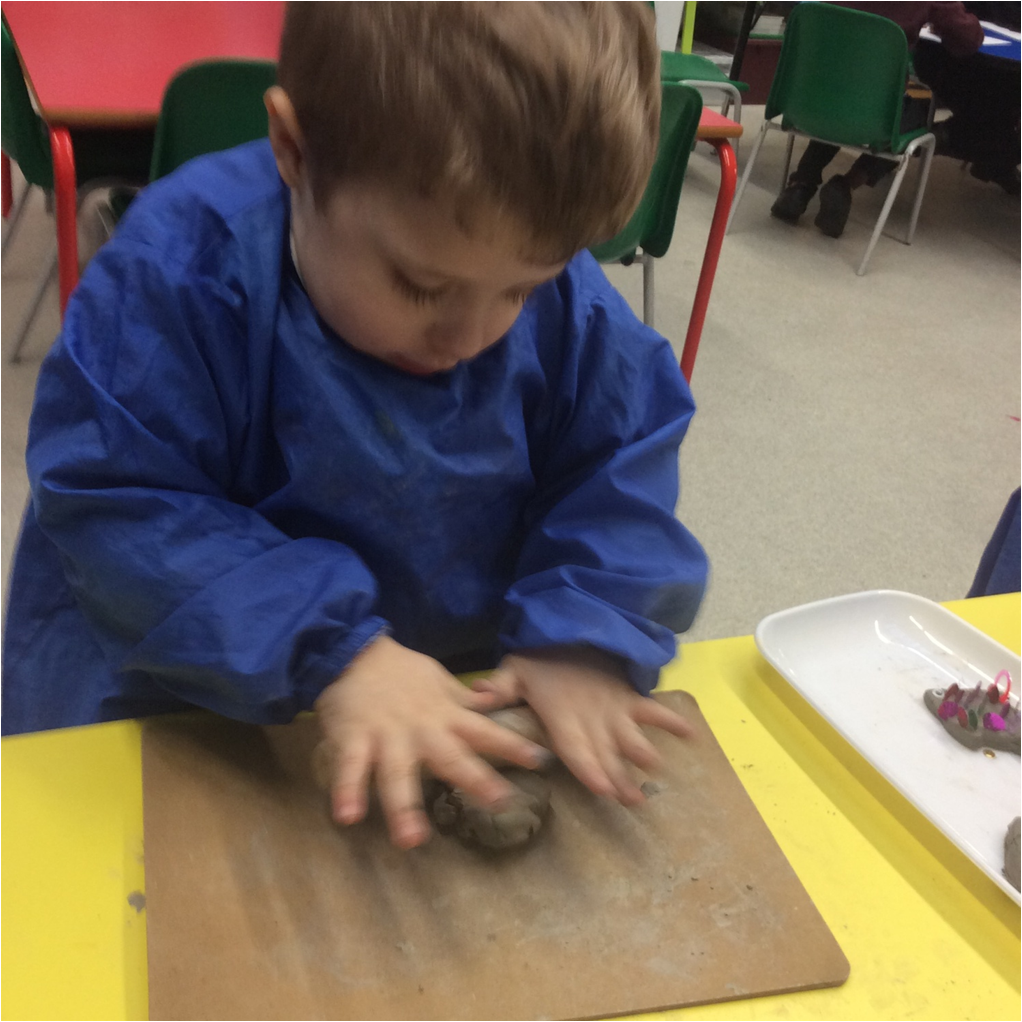

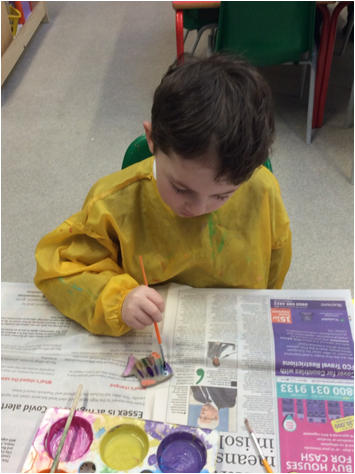
Once dry we painted on a layer of PVA glue and our fish were ready to swim away!
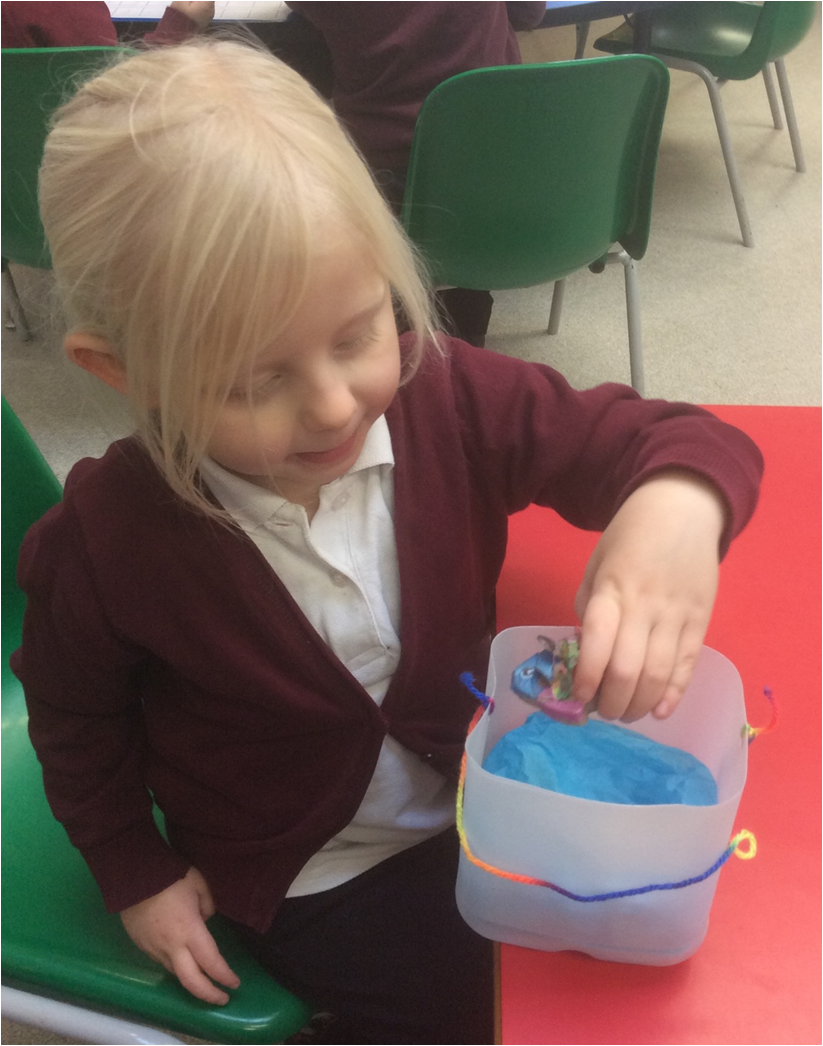
To bring them home we made a bucket to transport them safely. We re-used plastic milk bottles, threaded a wool handle through holes on each side, tied it and added some blue tissue paper water in the bottom before carefully placing our fish on top.

Can you spot your fish in the shoal of Antelope fish?